PrusaSlicer
Install
Download the
PrusaSlicer_config_bundle.iniDownload the Full Installer and open
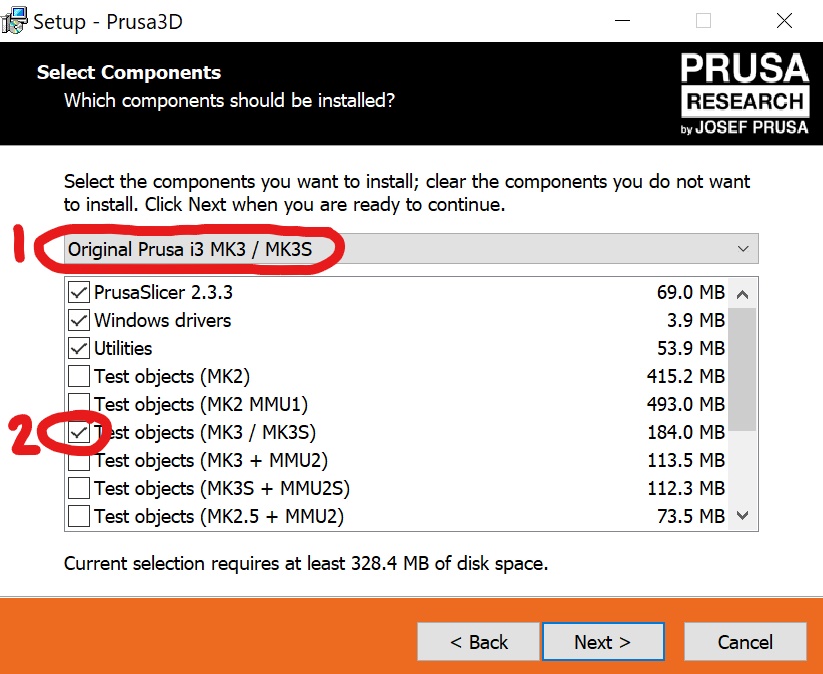
Press Next until the Select Components screen. Select Original Prusa i3 MK3 / MK3S from the dropdown menu. Deselect all Test objects
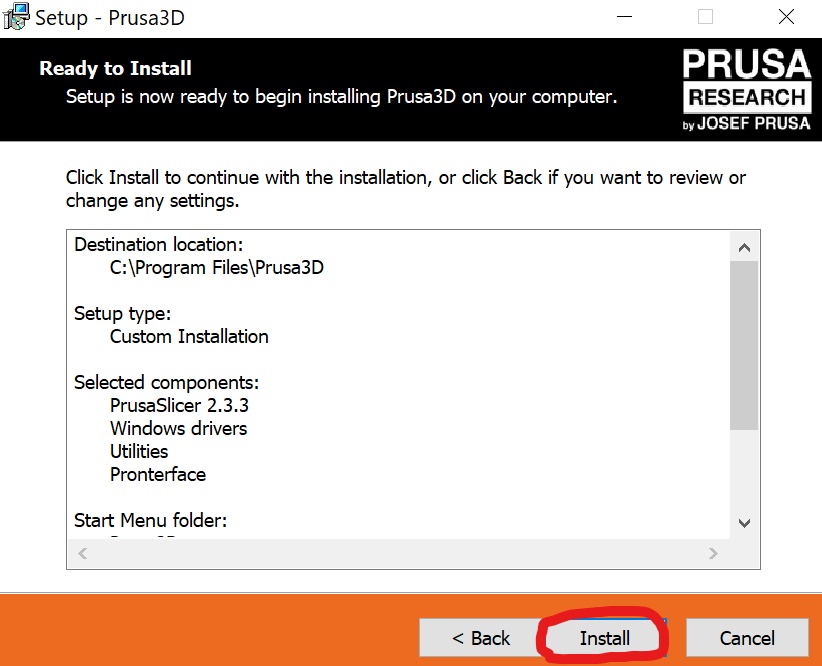
Continue through the installer and press Install

Install Prusa drivers that popup
Configuration
Open PrusaSlicer. The configuration wizard should pop up when you first open PrusaSlicer.
If it doesn’t appear, select Configuration > Configuration Wizard
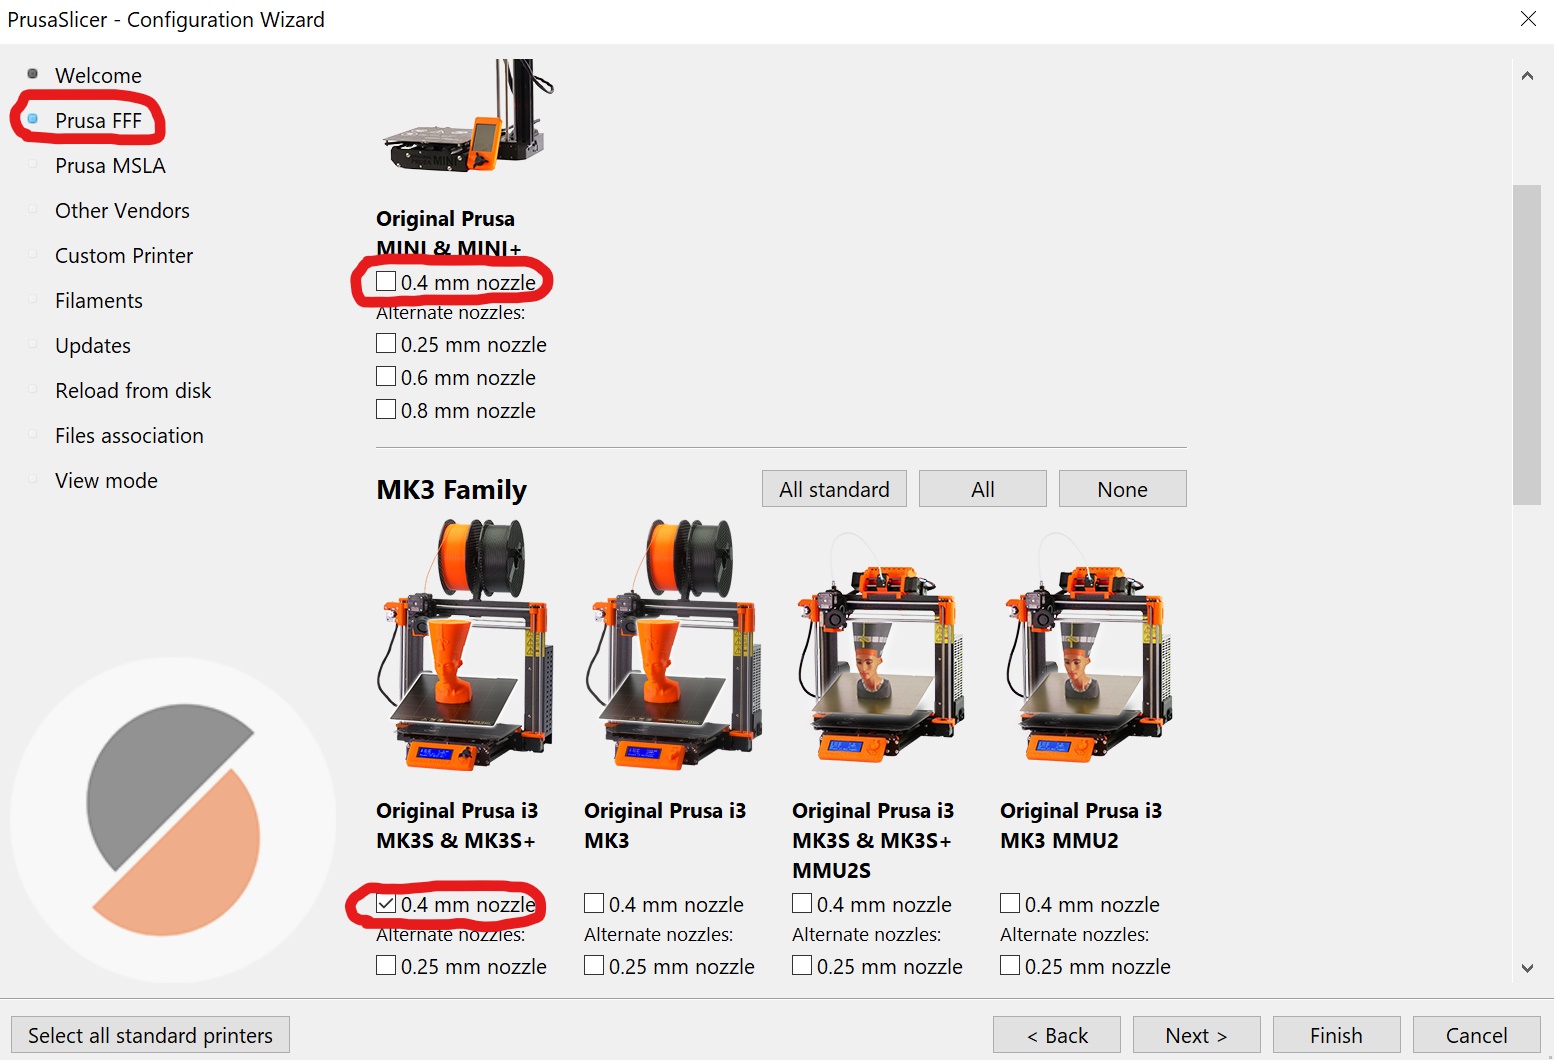
At Prusa FFF tab, deselect 0.4mm nozzle for the Prusa Mini. Select 0.4mm nozzle for Prusa i3 MK3S & MK3S+

At Filaments tab, deselect Prusament PLA and Prusament PVB. Select Prusa ABS, Prusa PETG, Prusa PLA
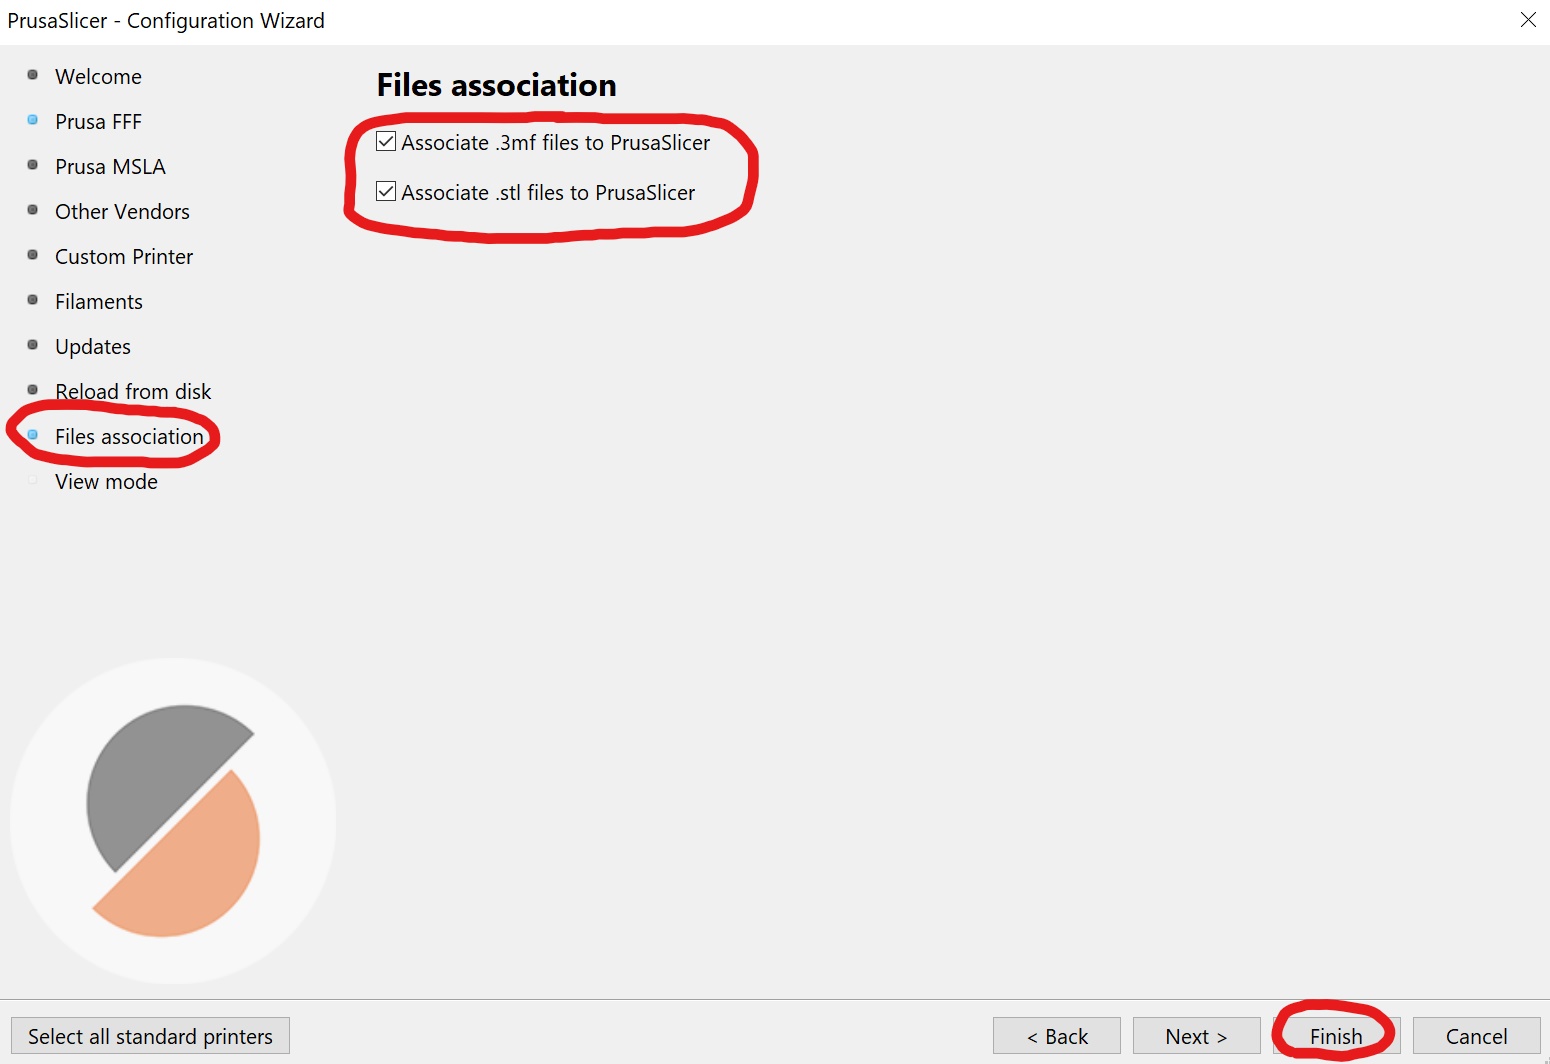
At Files association, select both boxes (Associate .3mf files to PrusaSlicer, Associate .stl files to PrusaSlicer)
Select Finish to complete the configuration wizard
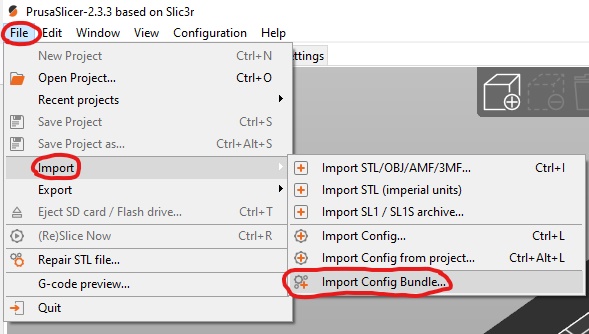
Select File > Import > Import Config Bundle
Select the PrusaSlicer config file that one downloaded at the start
Using the Slicer
Add STL
First download a STL
CAD Files section contains most of the custom files
A free model from a Design Library
Create your own using CAD Software
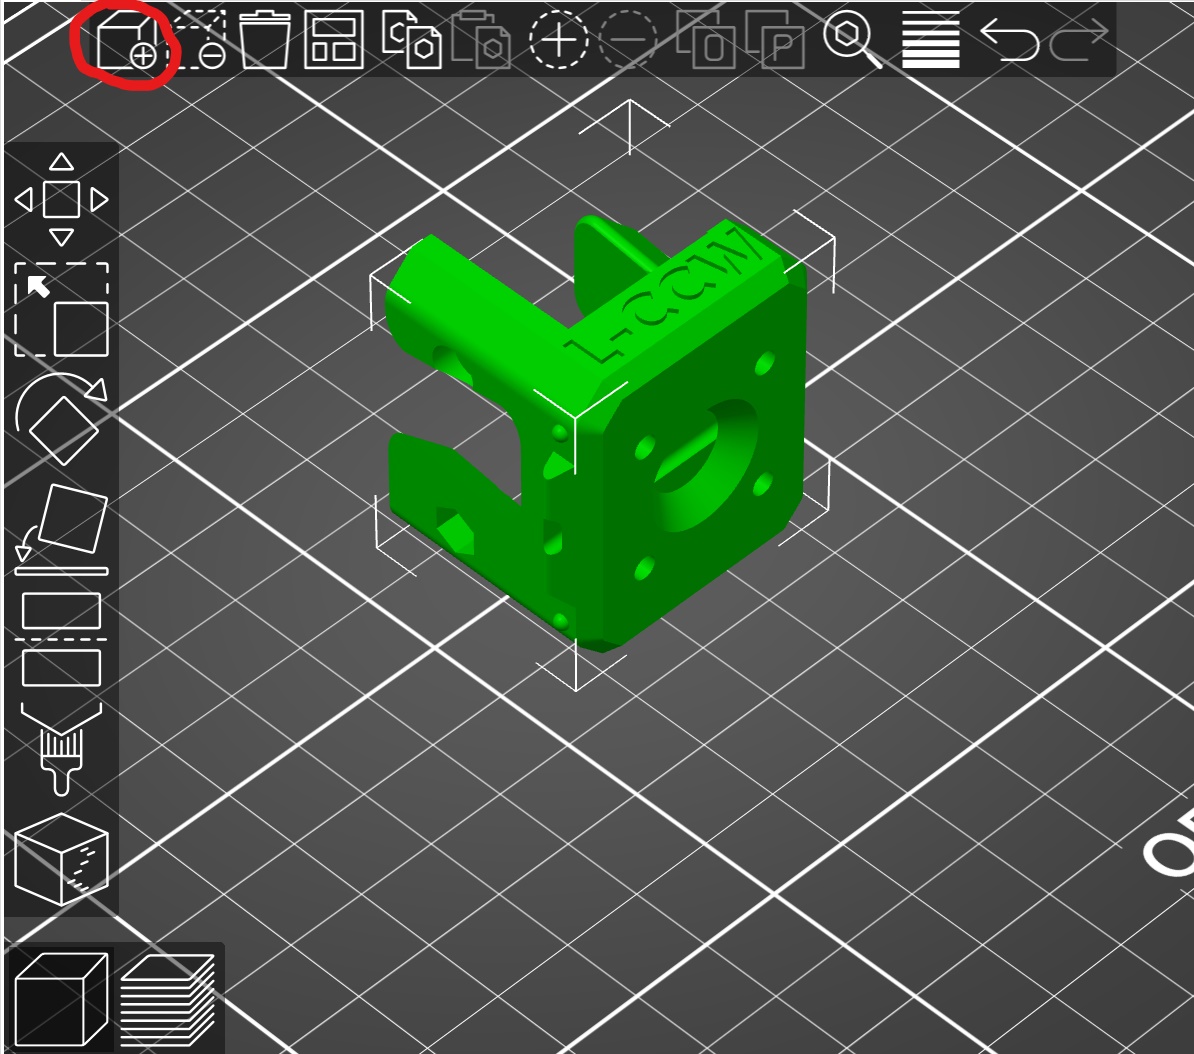
To add the STL to PrusaSlicer select Add in the top toolbar (CTRL+I)
Move
To move the model, click and drag it
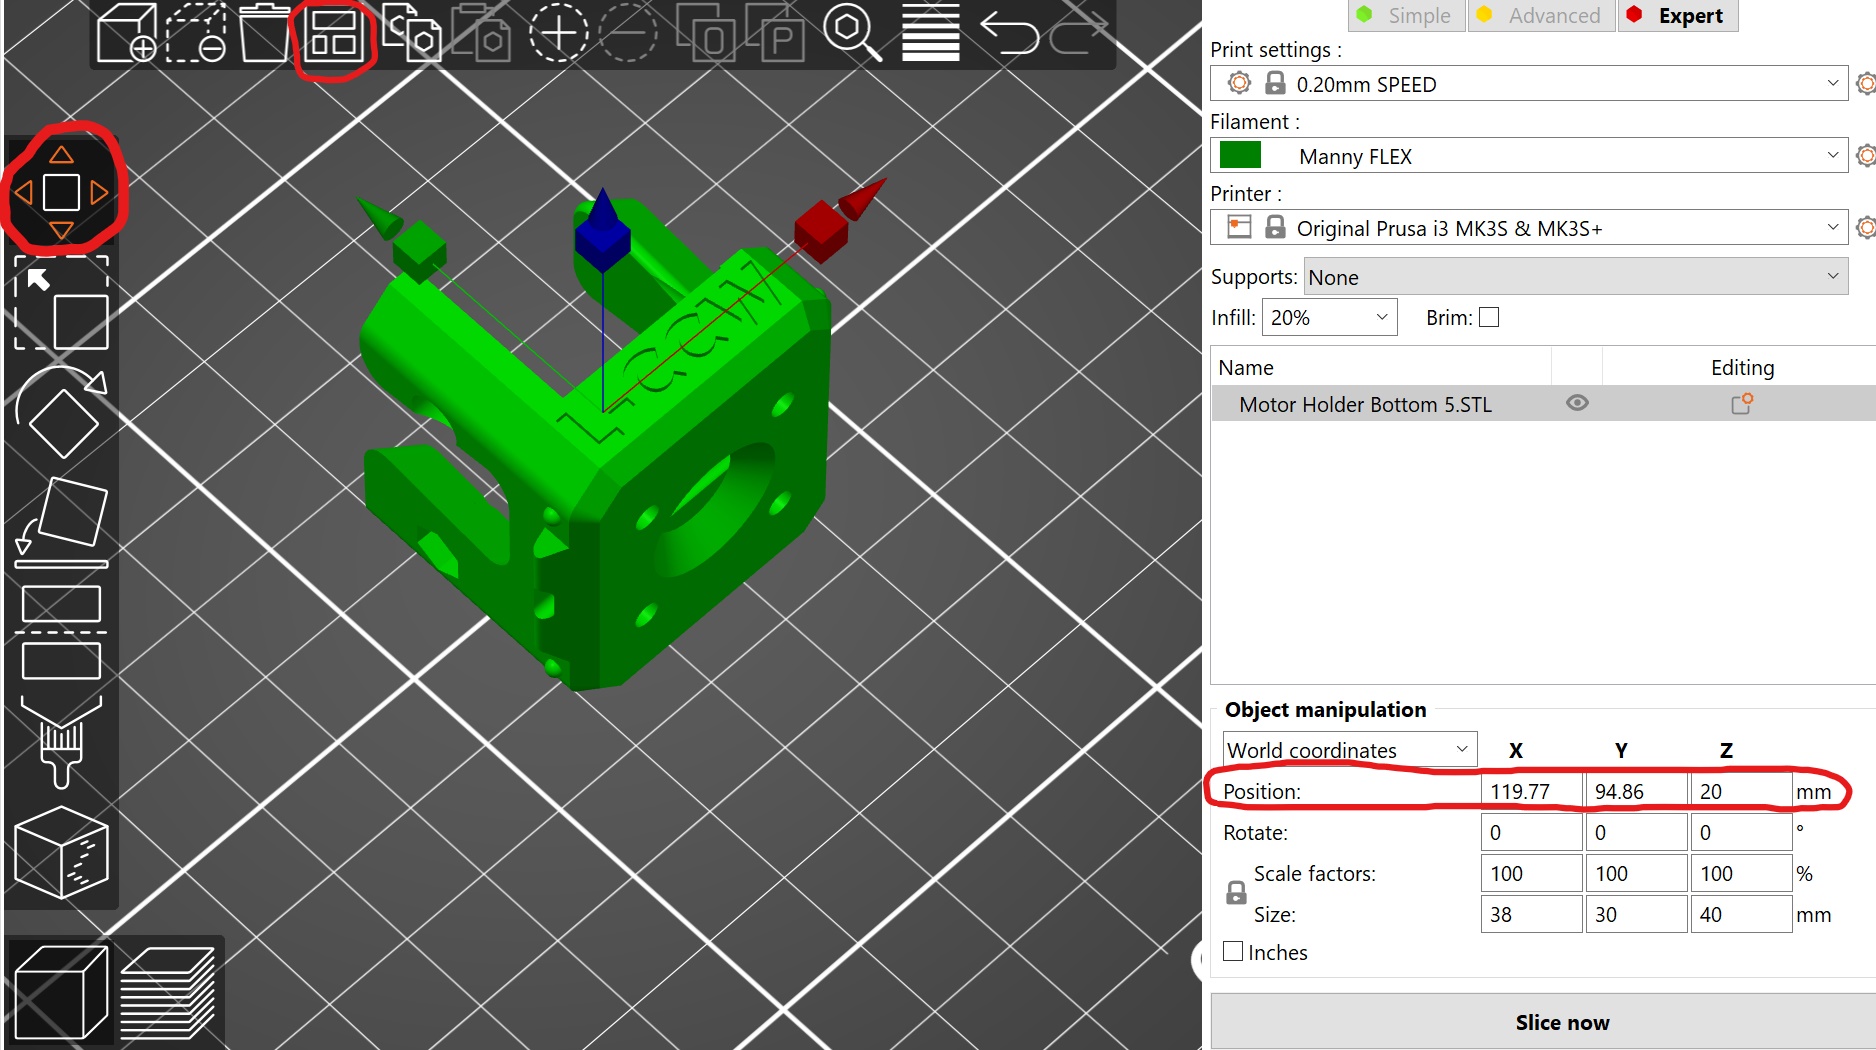
For greater precision, select the model, then select Move in the left toolbar (M)
You can drag the model from the coloured boxes
The position is displayed in the right info panel
These numbers can be changed directly if needed
The position is calculated from the centre of the model
To automatically arrange the items, select Arrange in the top toolbar (A)
Rotate
To rotate to a face, select Place on face in the left toolbar (F), then click on the face (highlighted in white)
Ensure the correct face is selected. This can be difficult on models with round faces
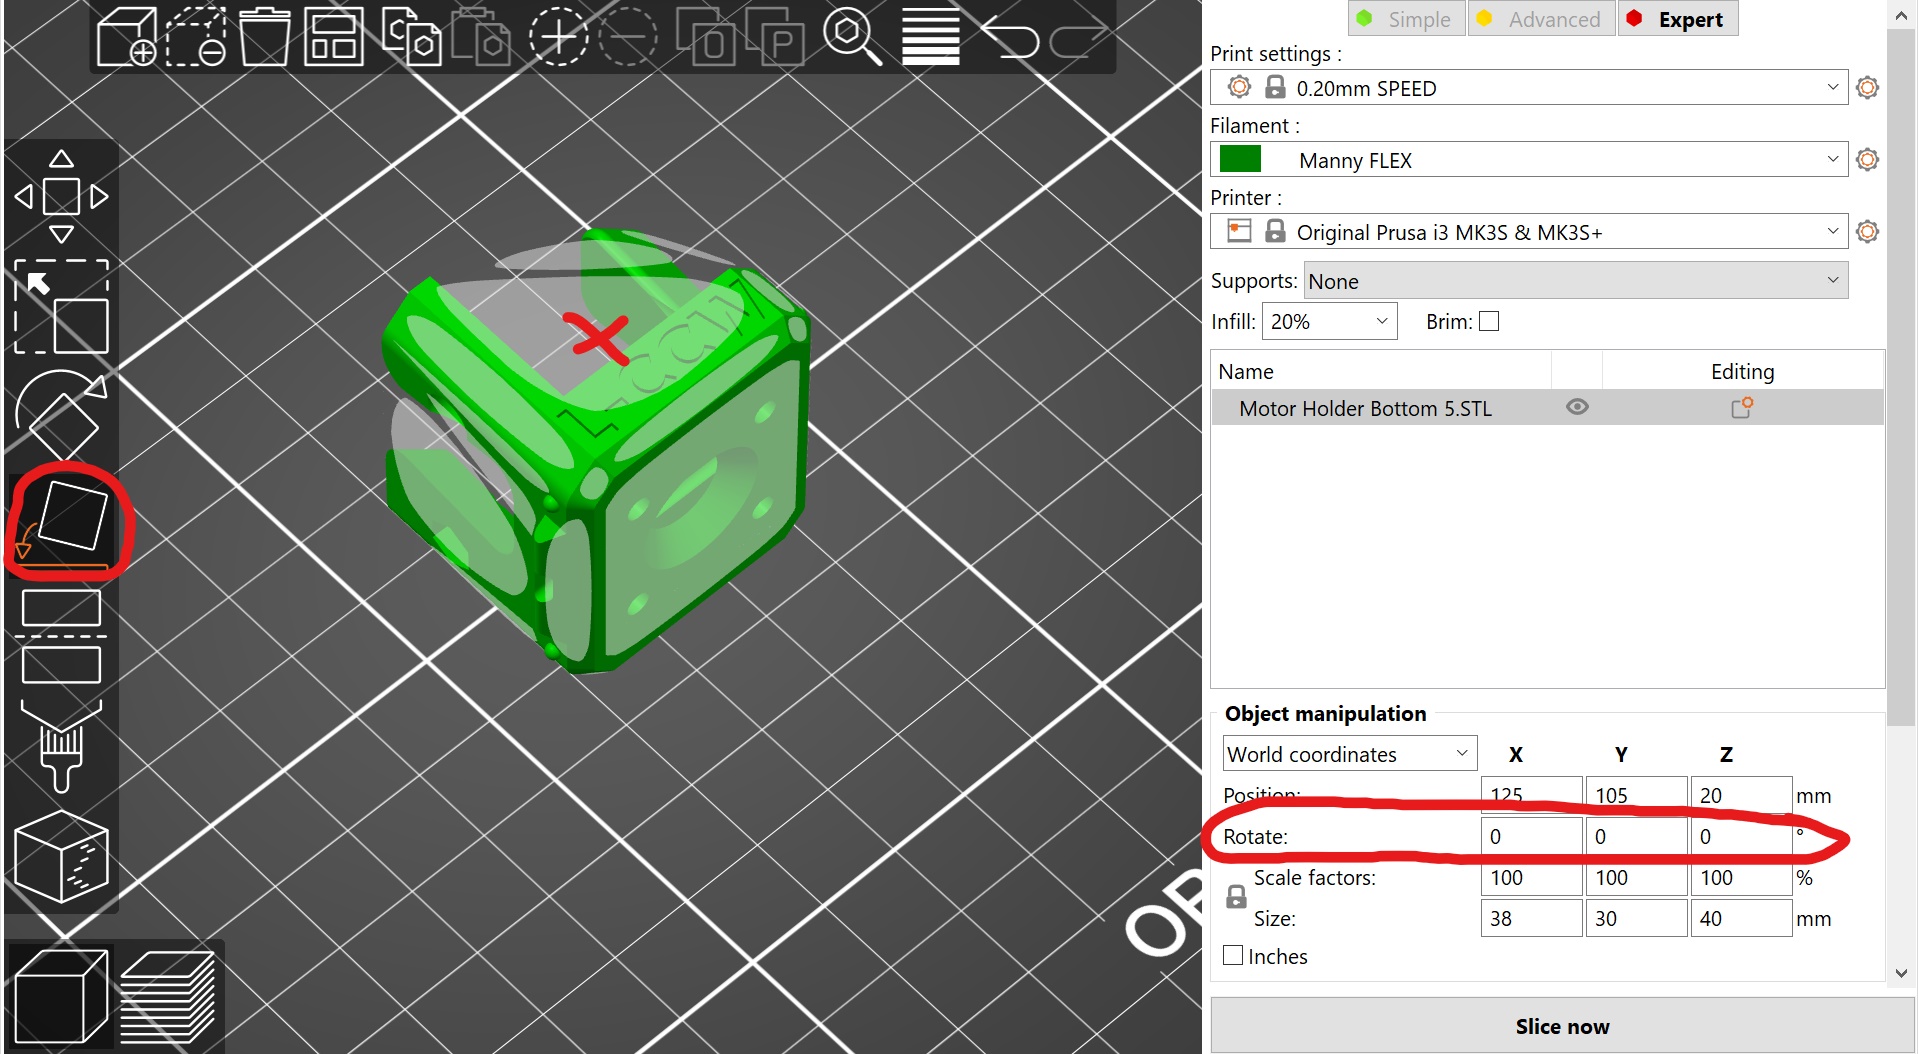
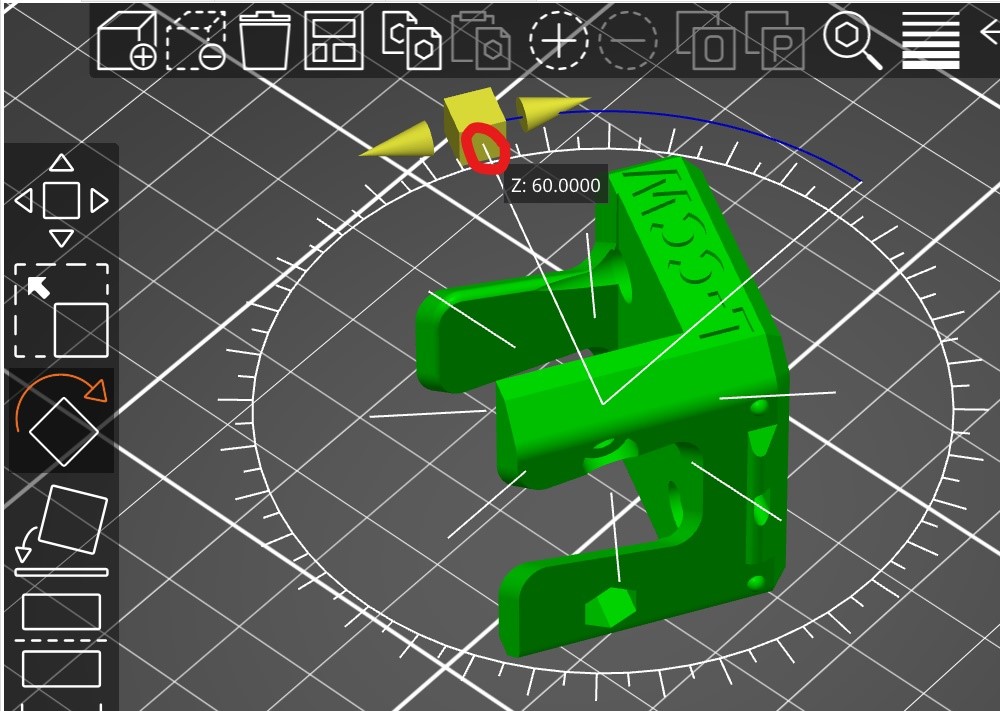
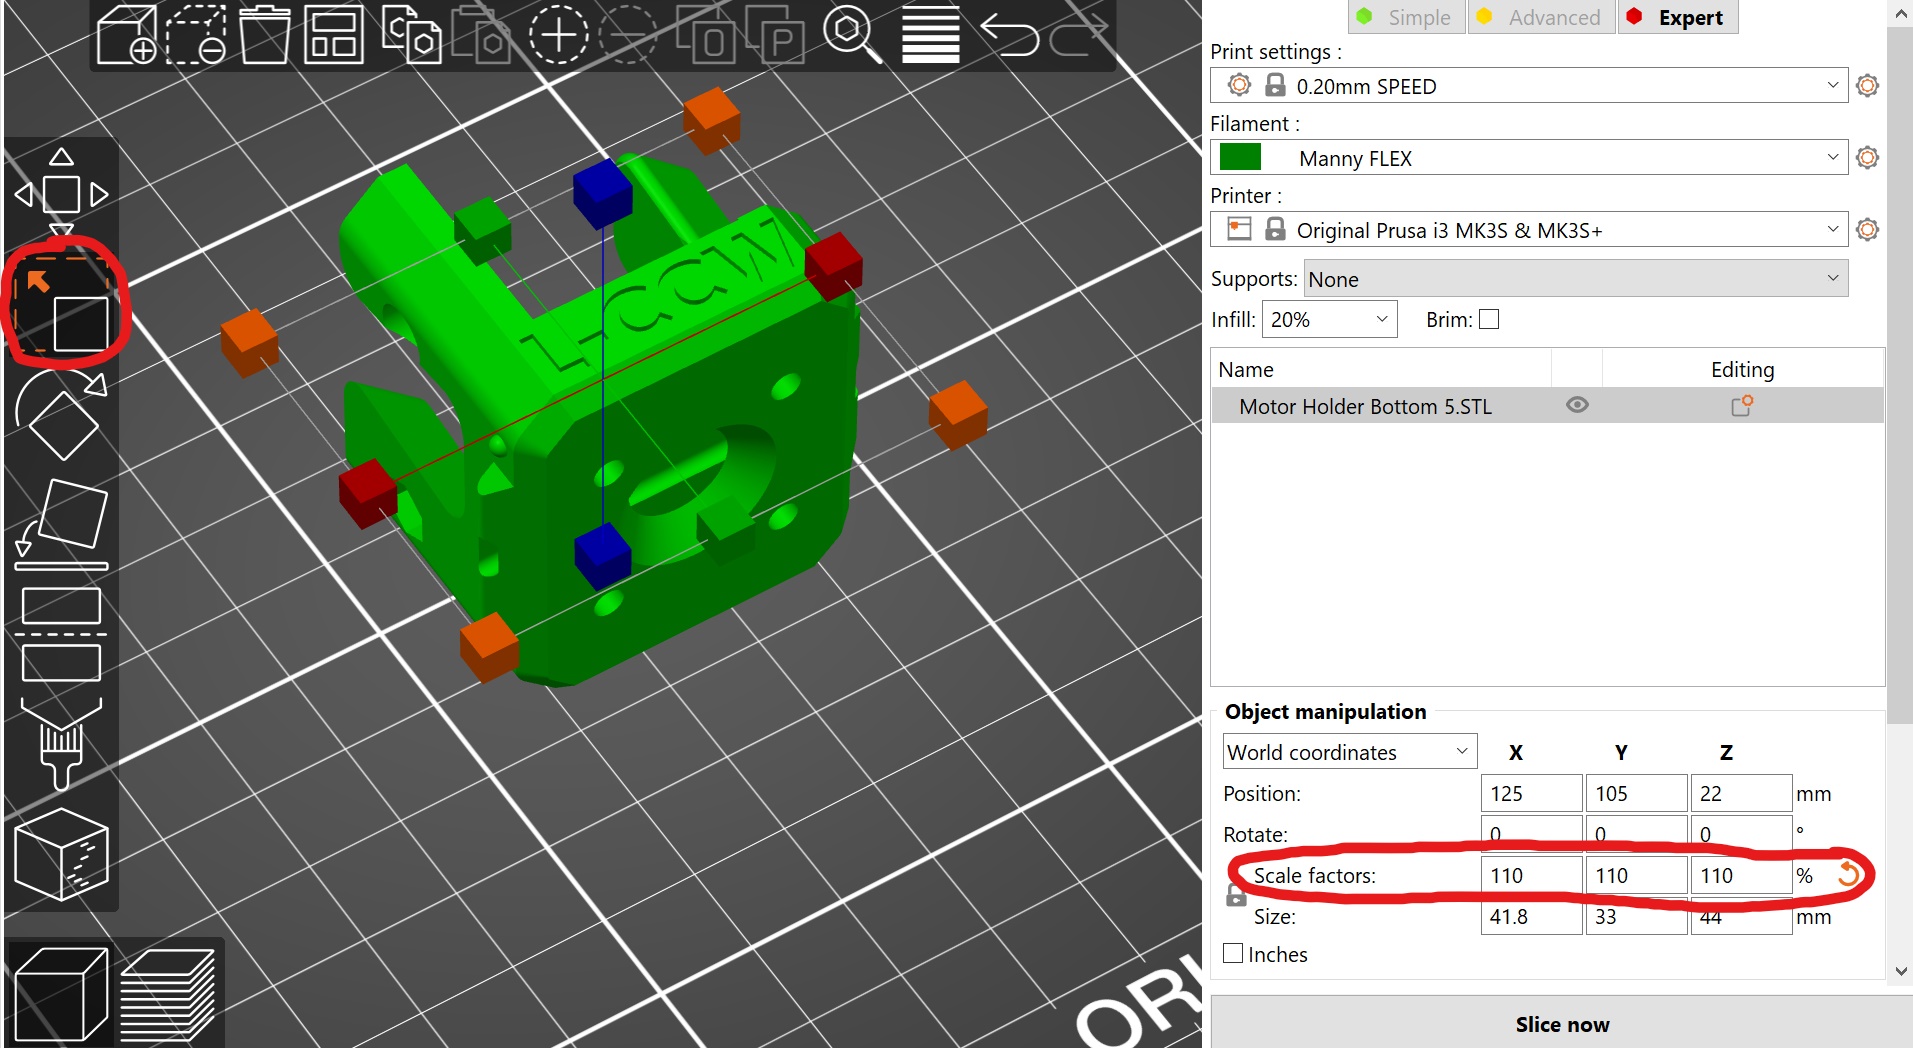
For greater precision, select the model, then select Rotate in the left toolbar (R)
You can rotate the model from the coloured boxes
There are default angles which the model can snap to. The inner ring has 45° increments, outer ring 5°. Move the mouse to these lines to snap to them

|
|
The rotation is displayed in the right info panel
These numbers can be changed directly if needed
Rotation can be reset to default by selecting the orange return arrow in the right info panel
Slice
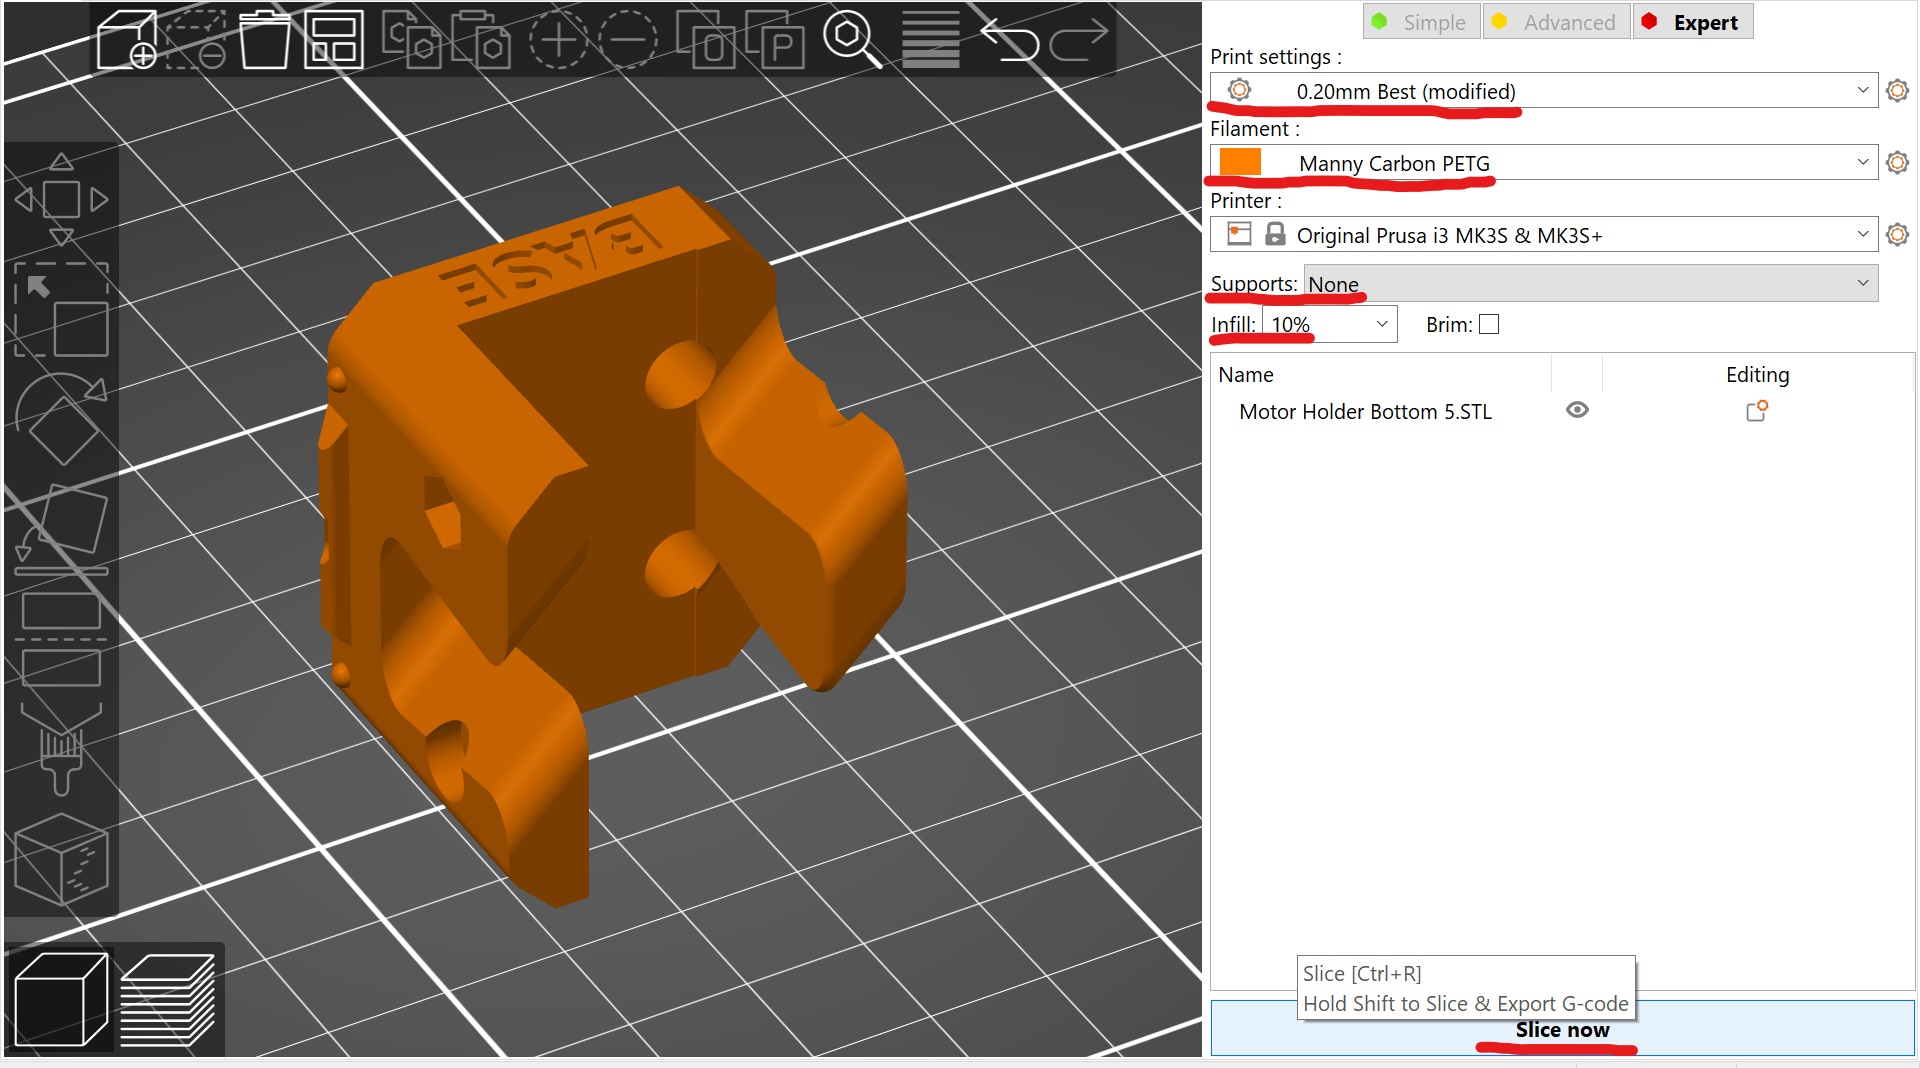
In the right info panel set the following settings
- Print Settings
0.20mm Best
- Filament
Manny Carbon PETG
- Printer
Original Prusa i3 MK3S $ MK3S+
- Supports
None
- Infill
10%
Press Slice now
The view now switches from 3D editor to preview
Supports
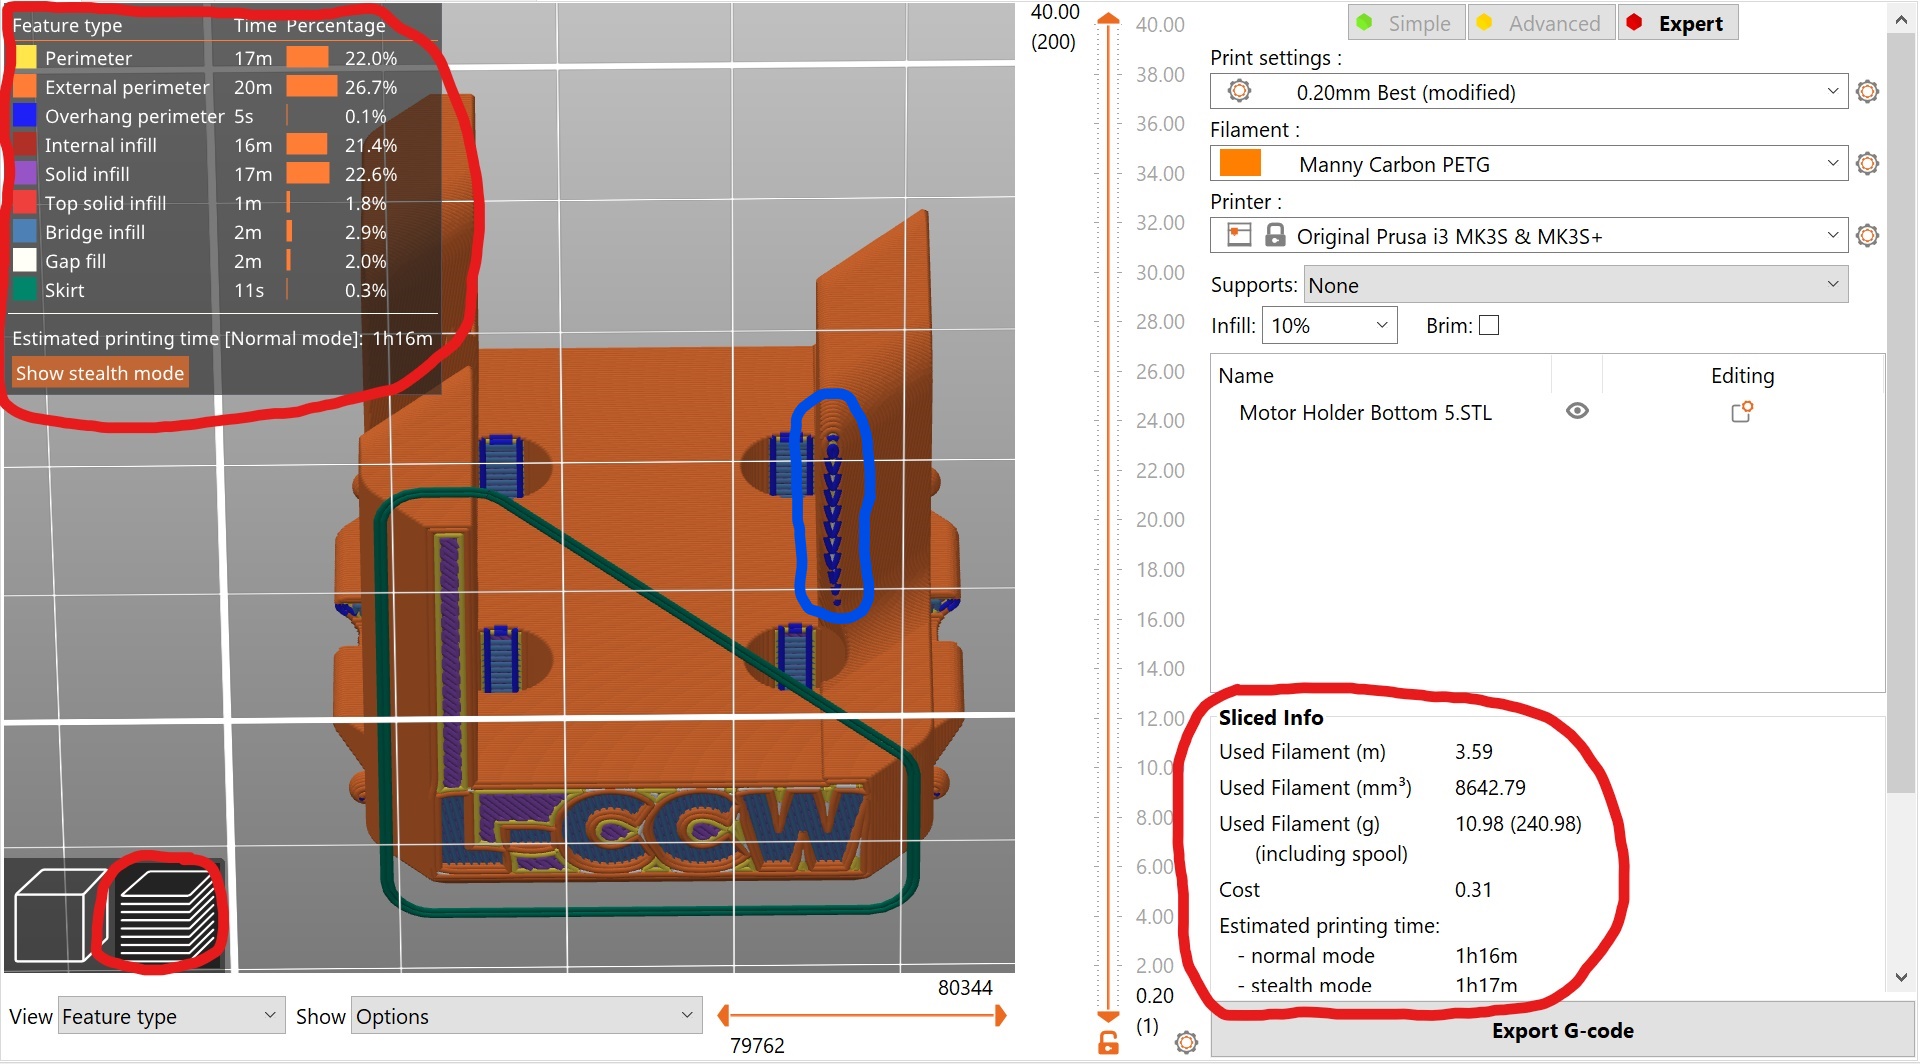
In the right info panel there is now a Sliced Info section where you can note the time of print
The breakdown of the type of printing features is viewable in the top left box
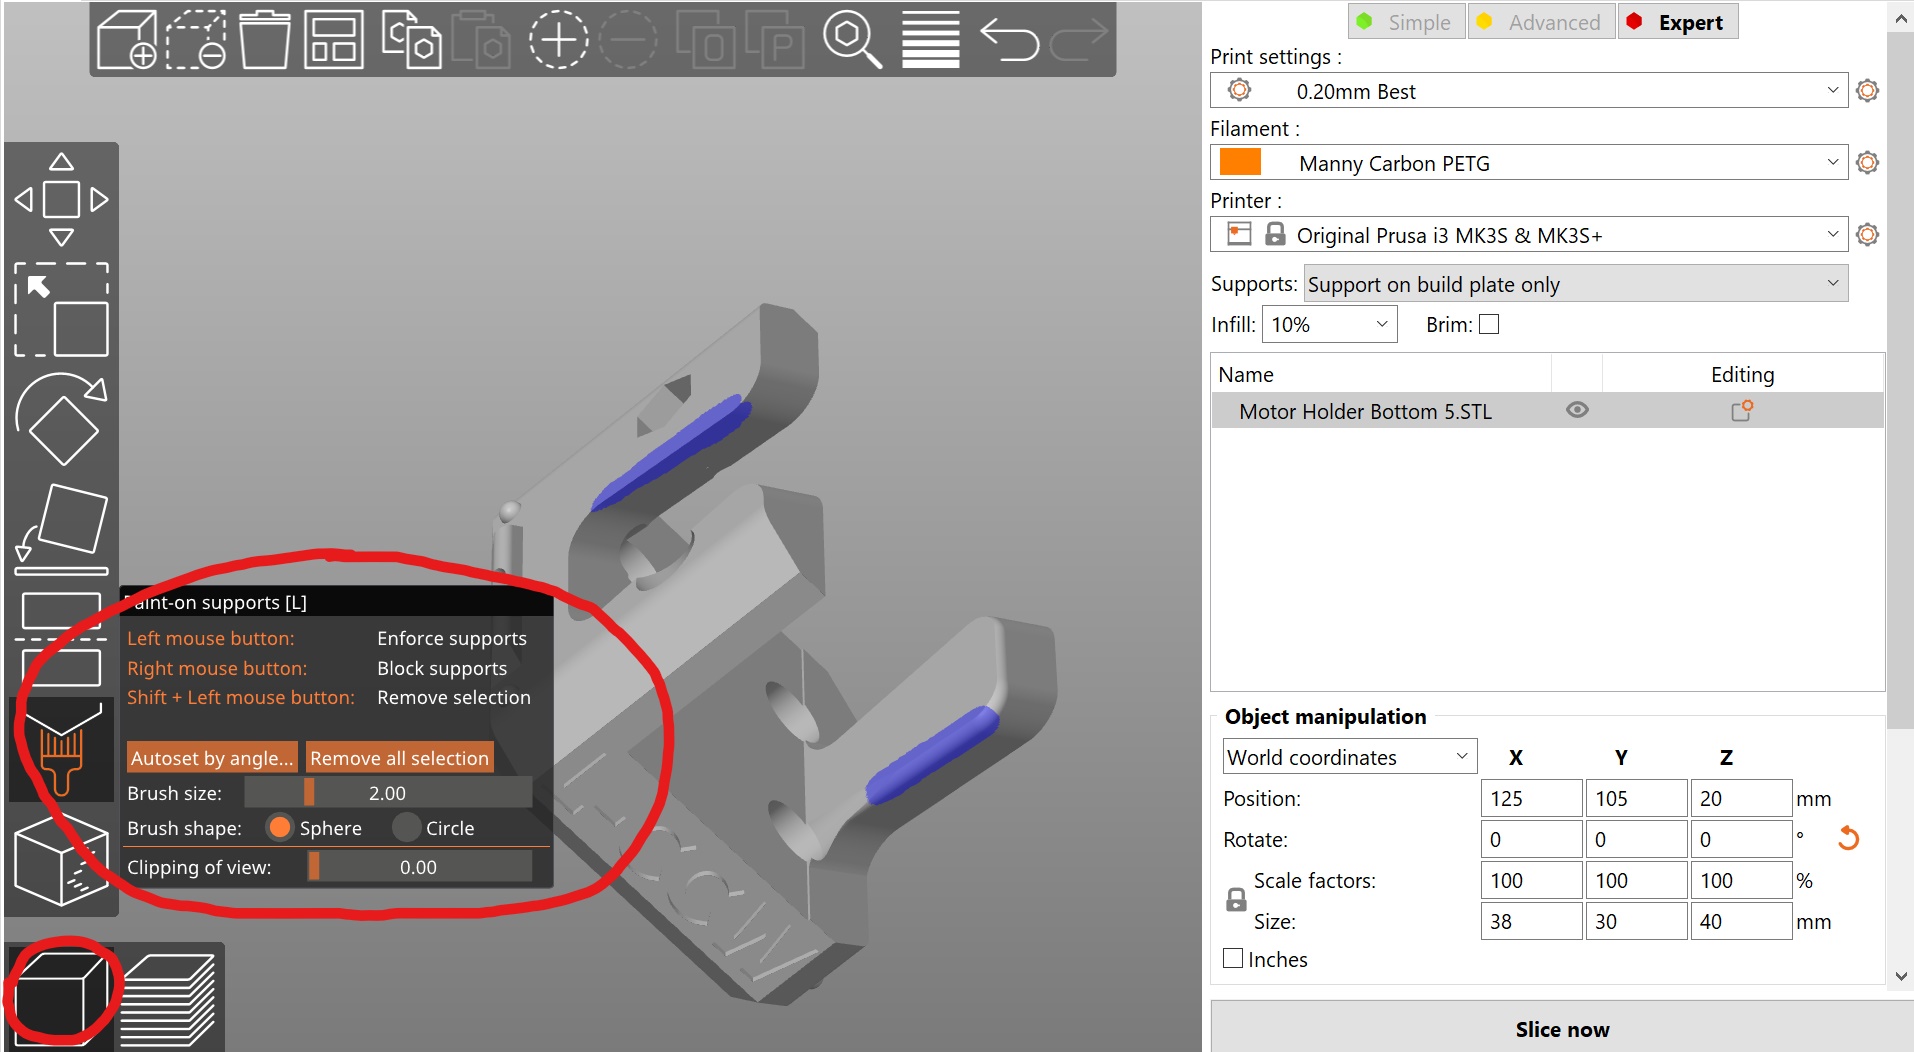
We are interested in the light and dark blue parts of the print which are overhangs and bridges
The printer can handle short overhangs for example the text on the bottom and the screw holes in the model
The printer cannot print in mid air, an example problem area has been circled in blue in the image below
To fix this we can add supports
In the right info panel set the following settings
- Supports
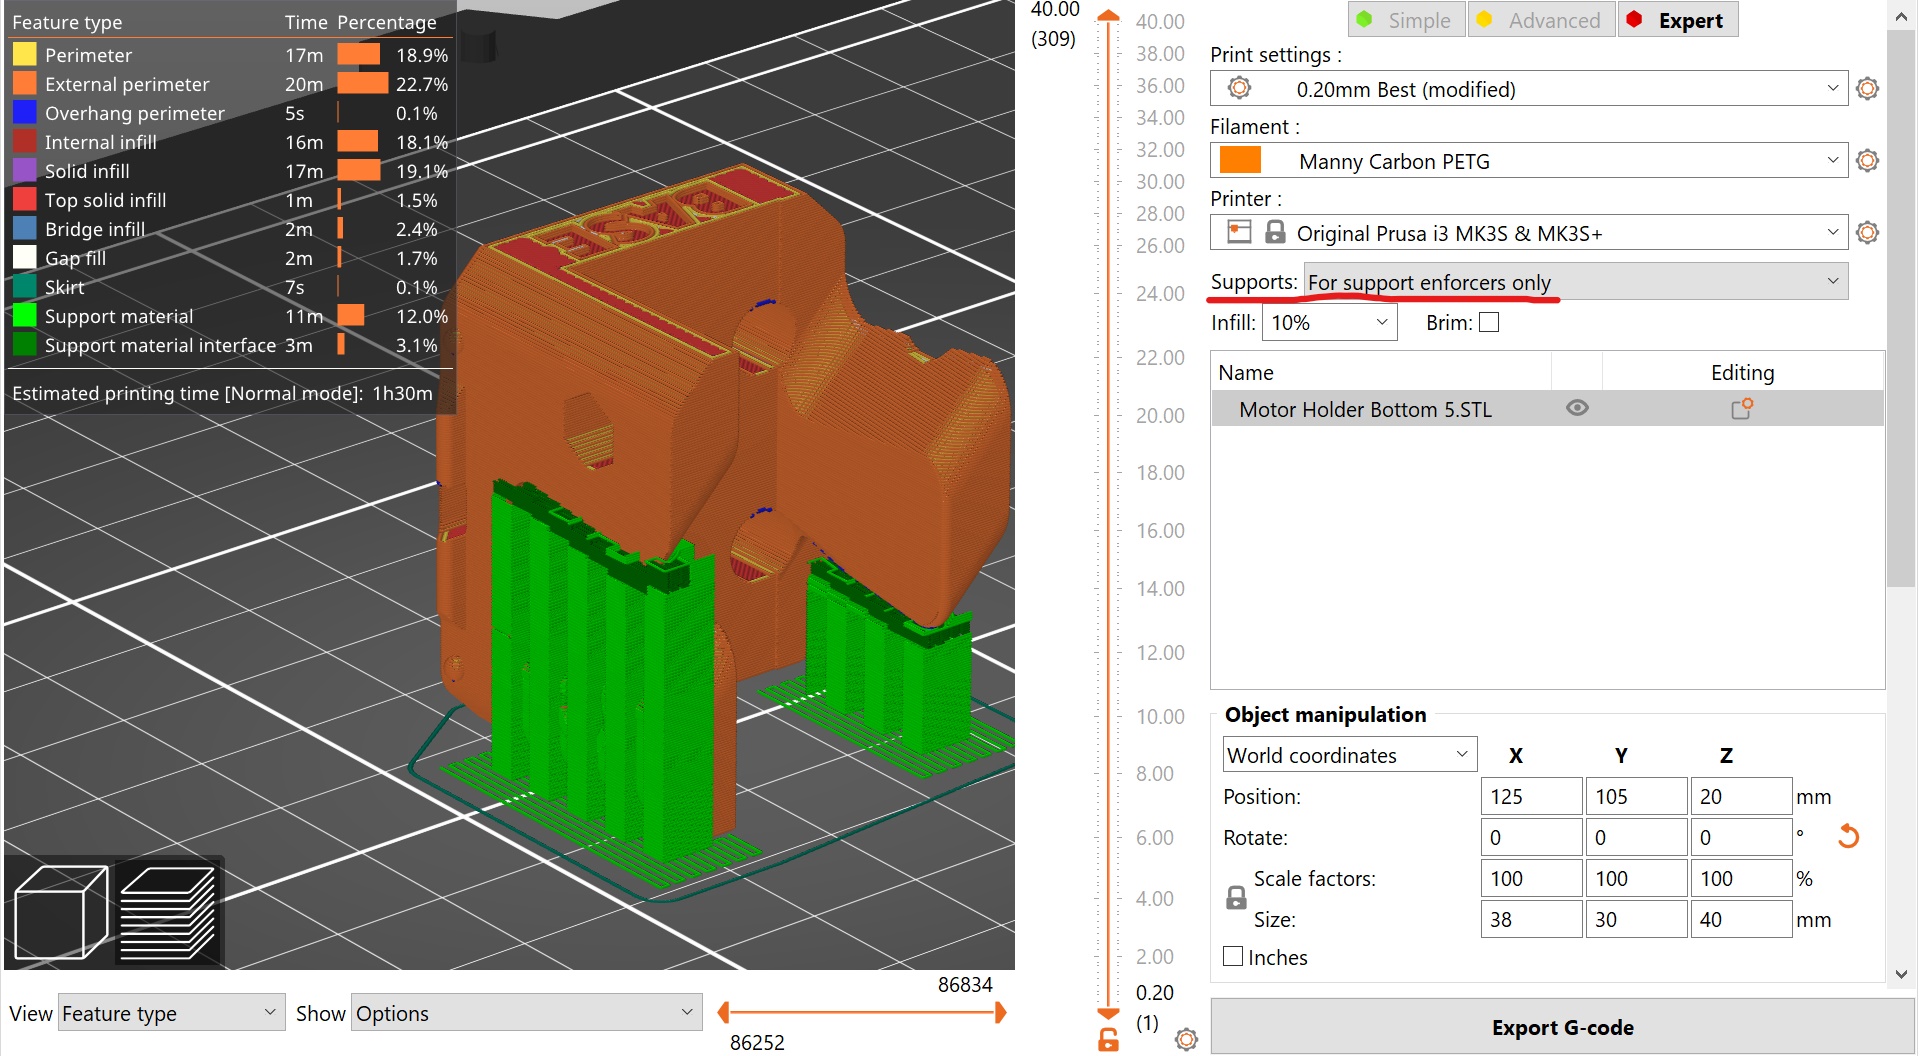
Support build plate only
This setting adds supports if the overhanging area is above the build plate
They are the most reliable supports and the easiest to remove
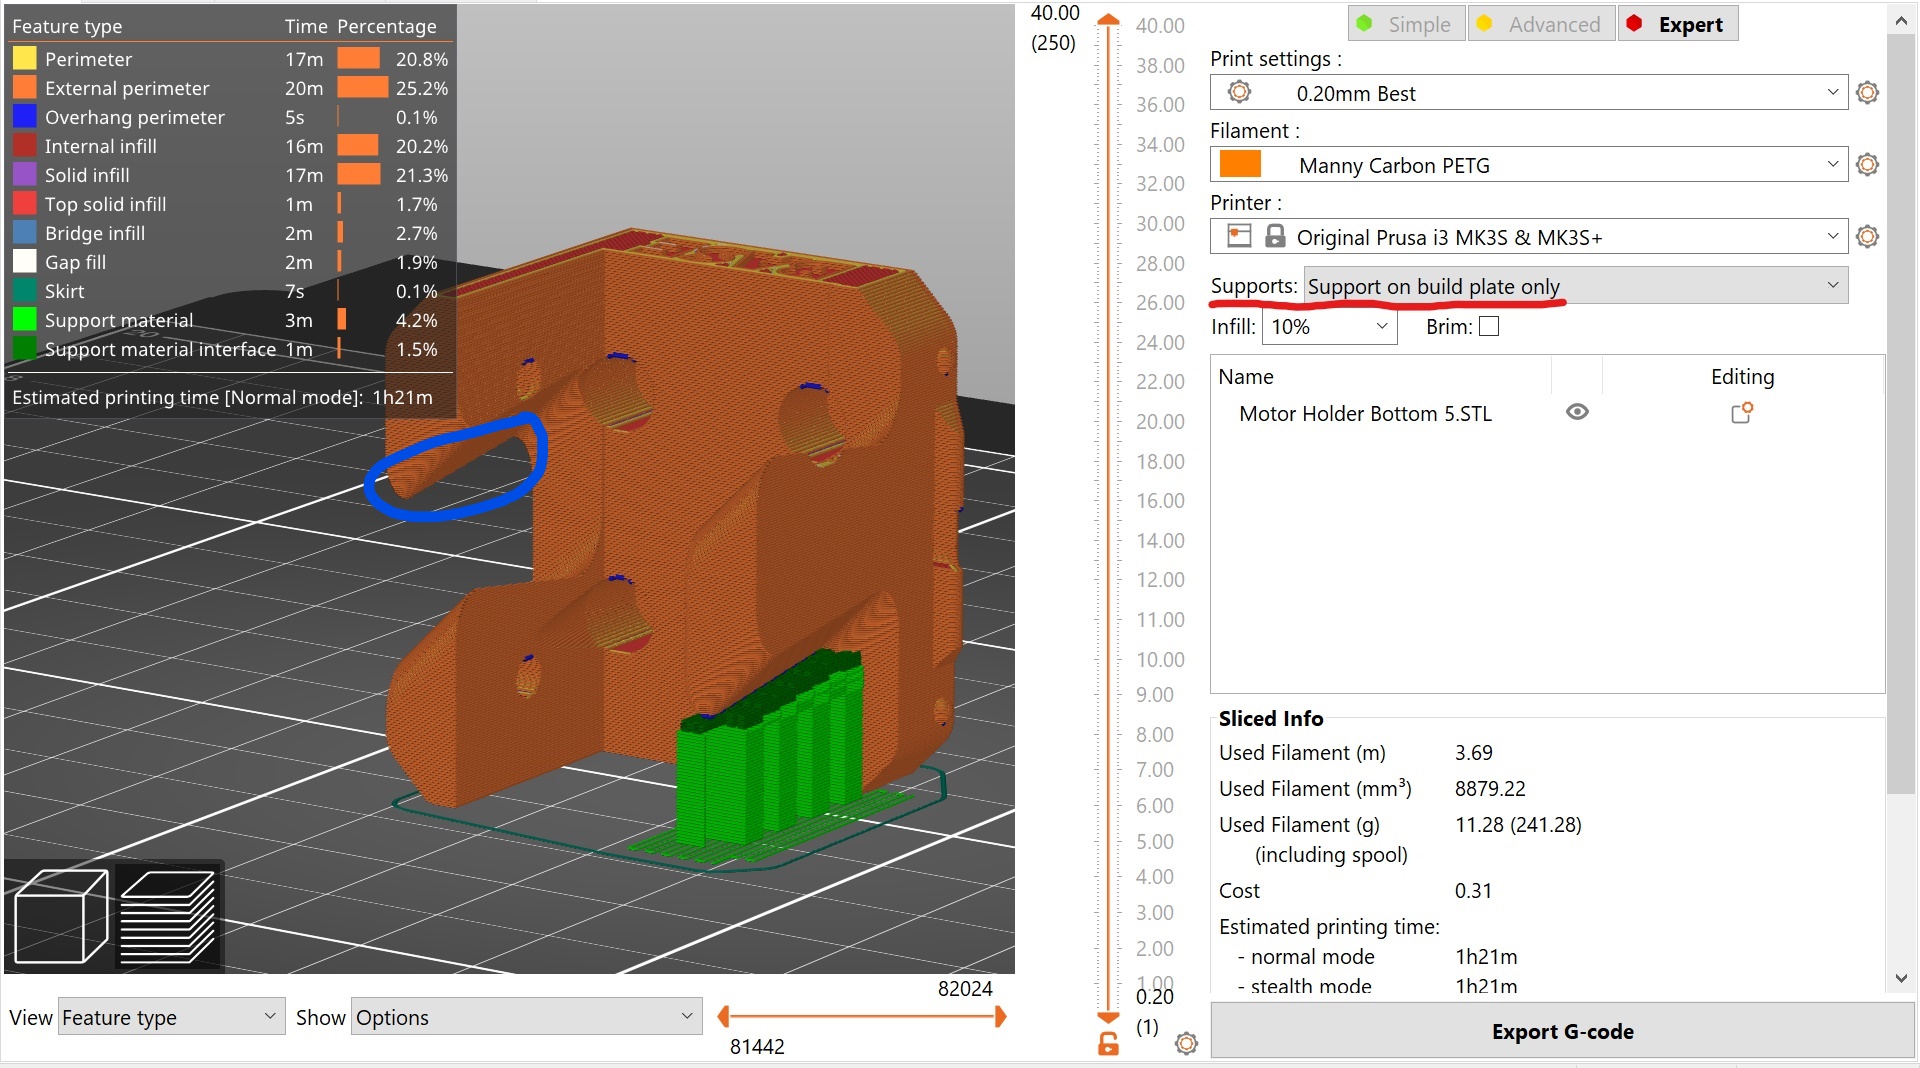
Highlighted in blue in the above image, there is still unsupported overhangs.
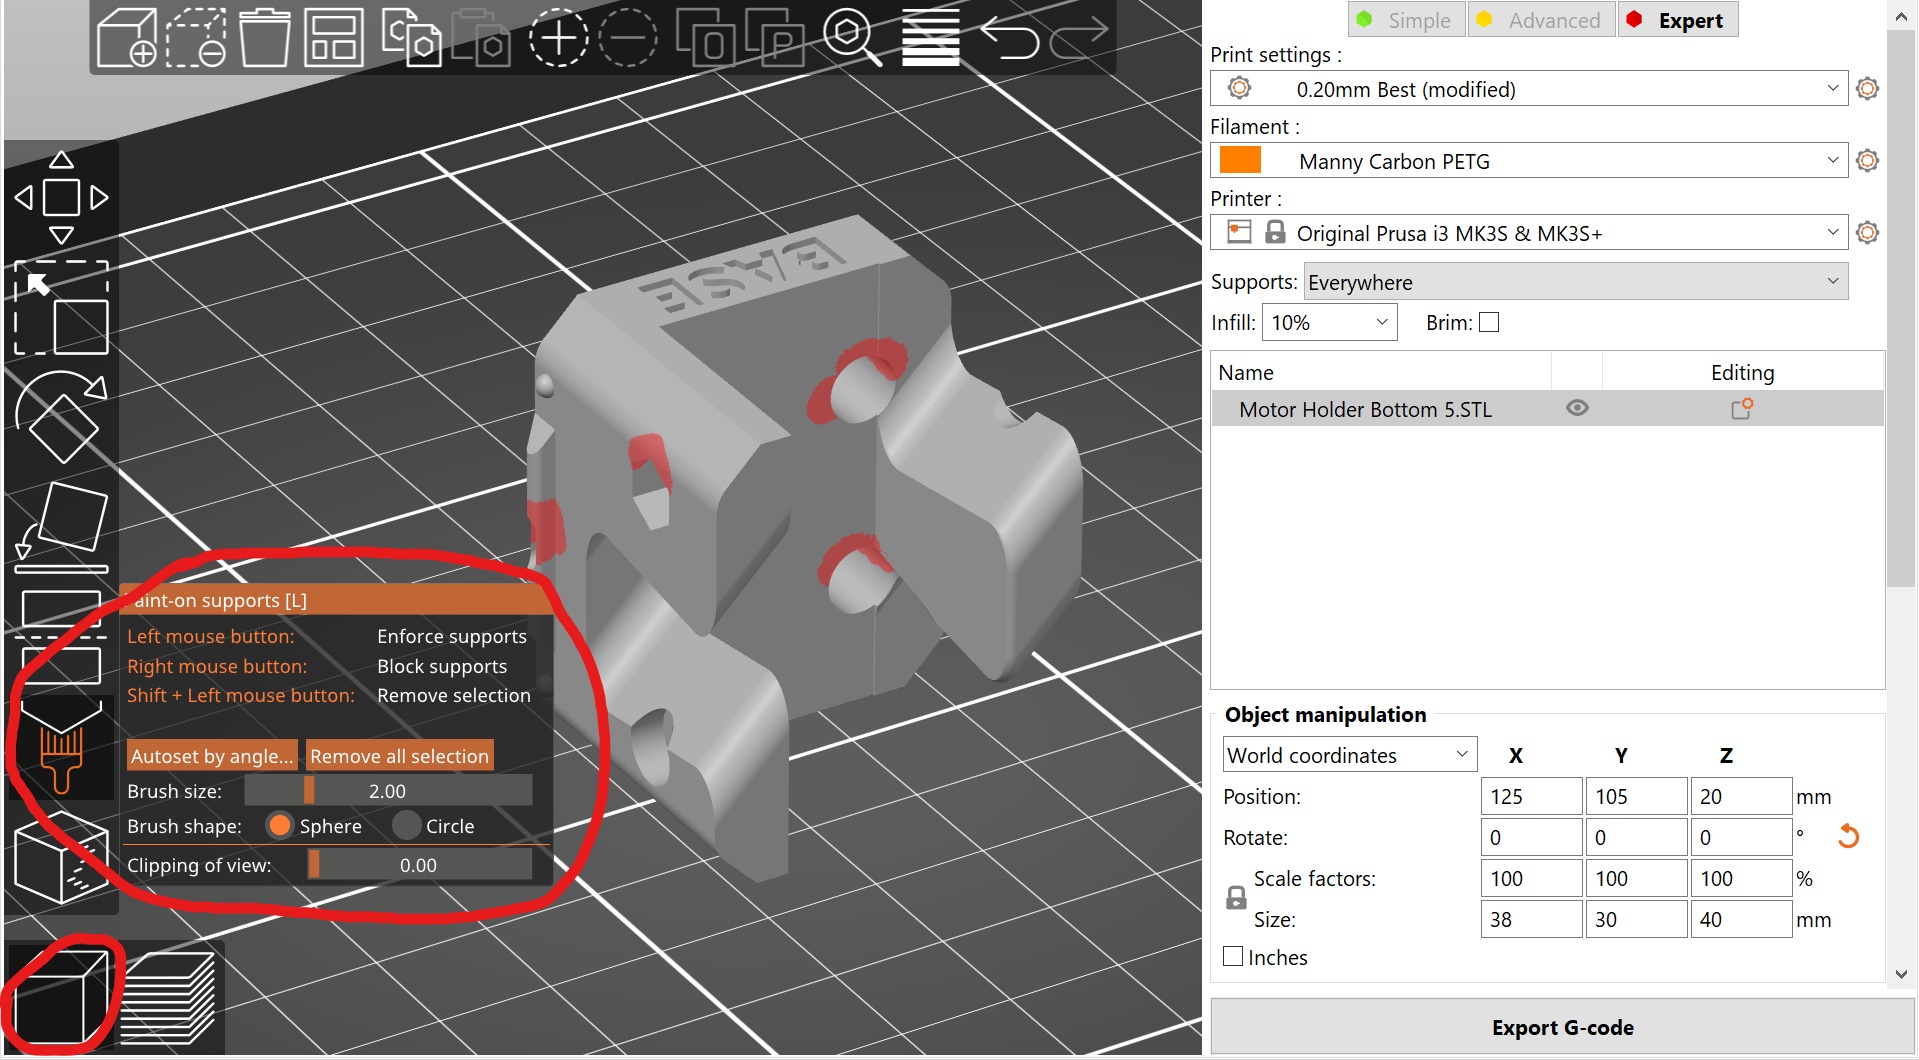
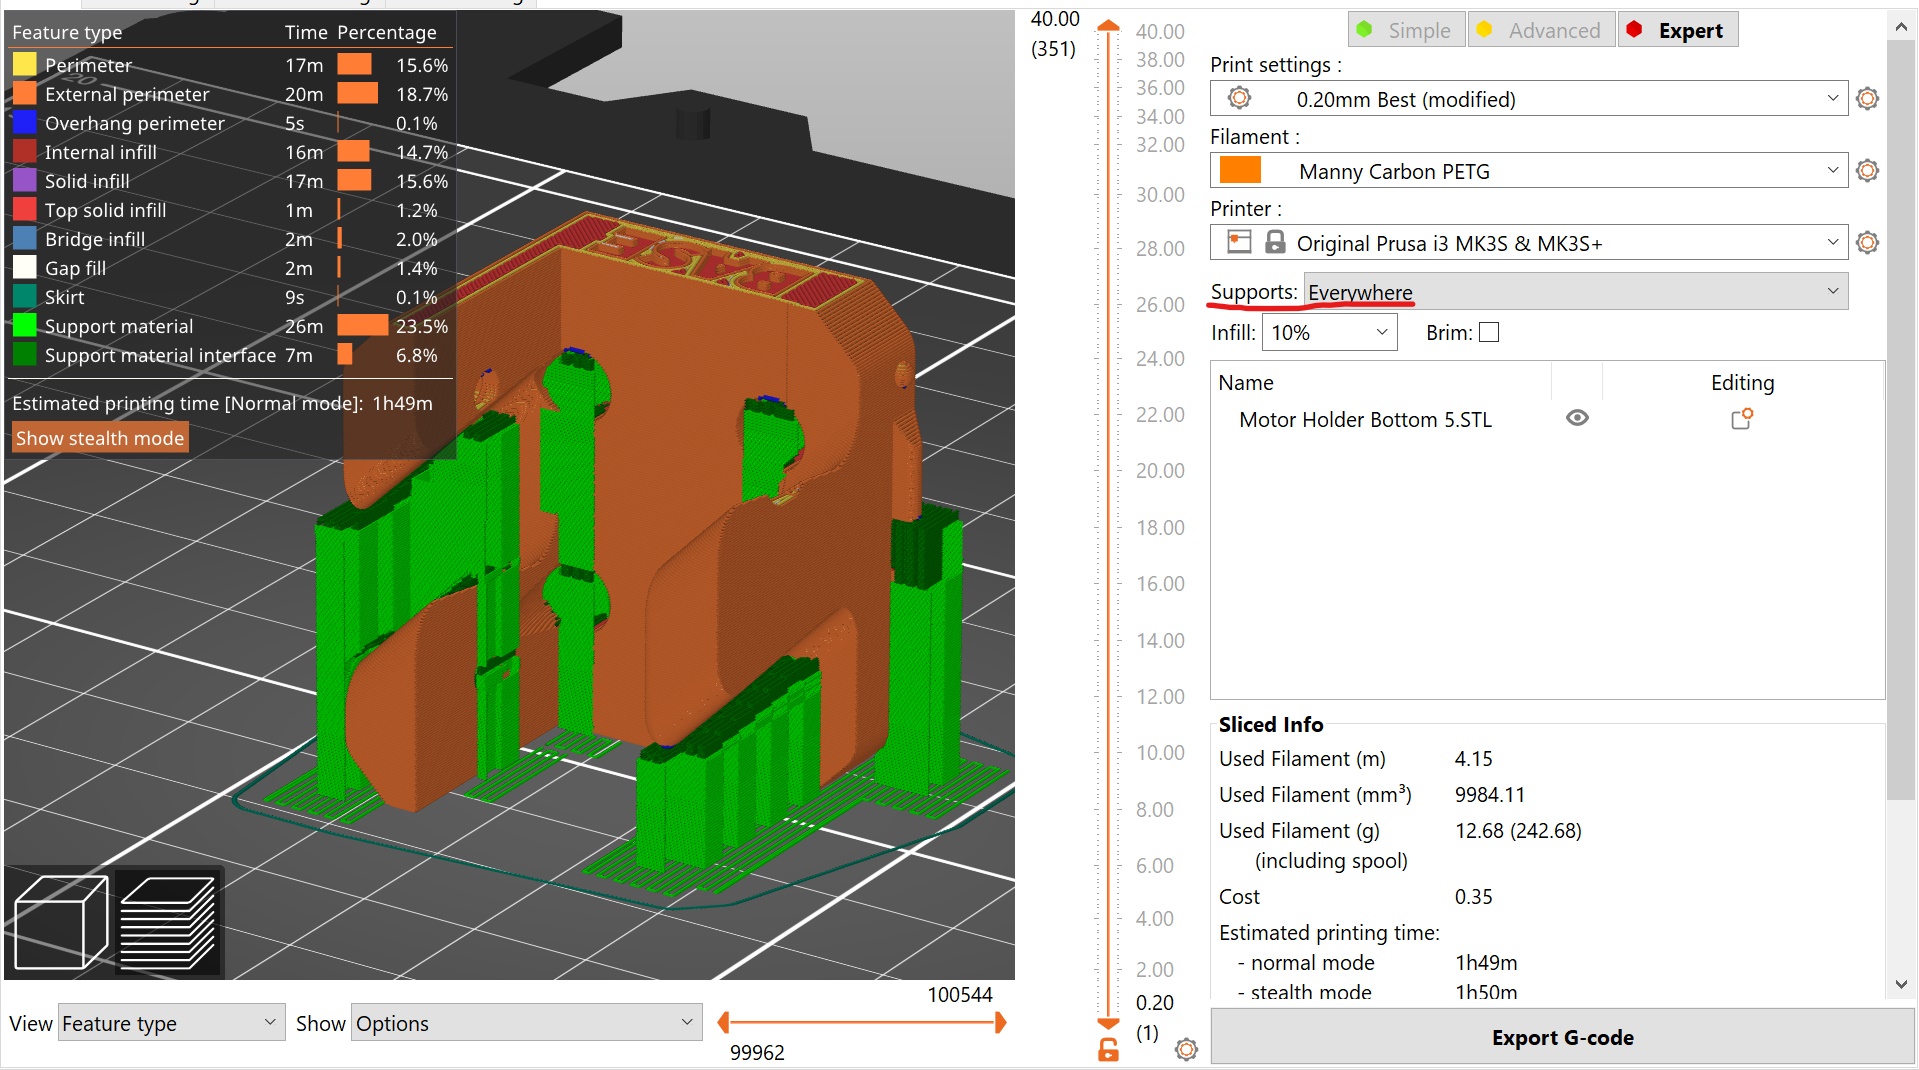
In the right info panel set the following settings
- Supports
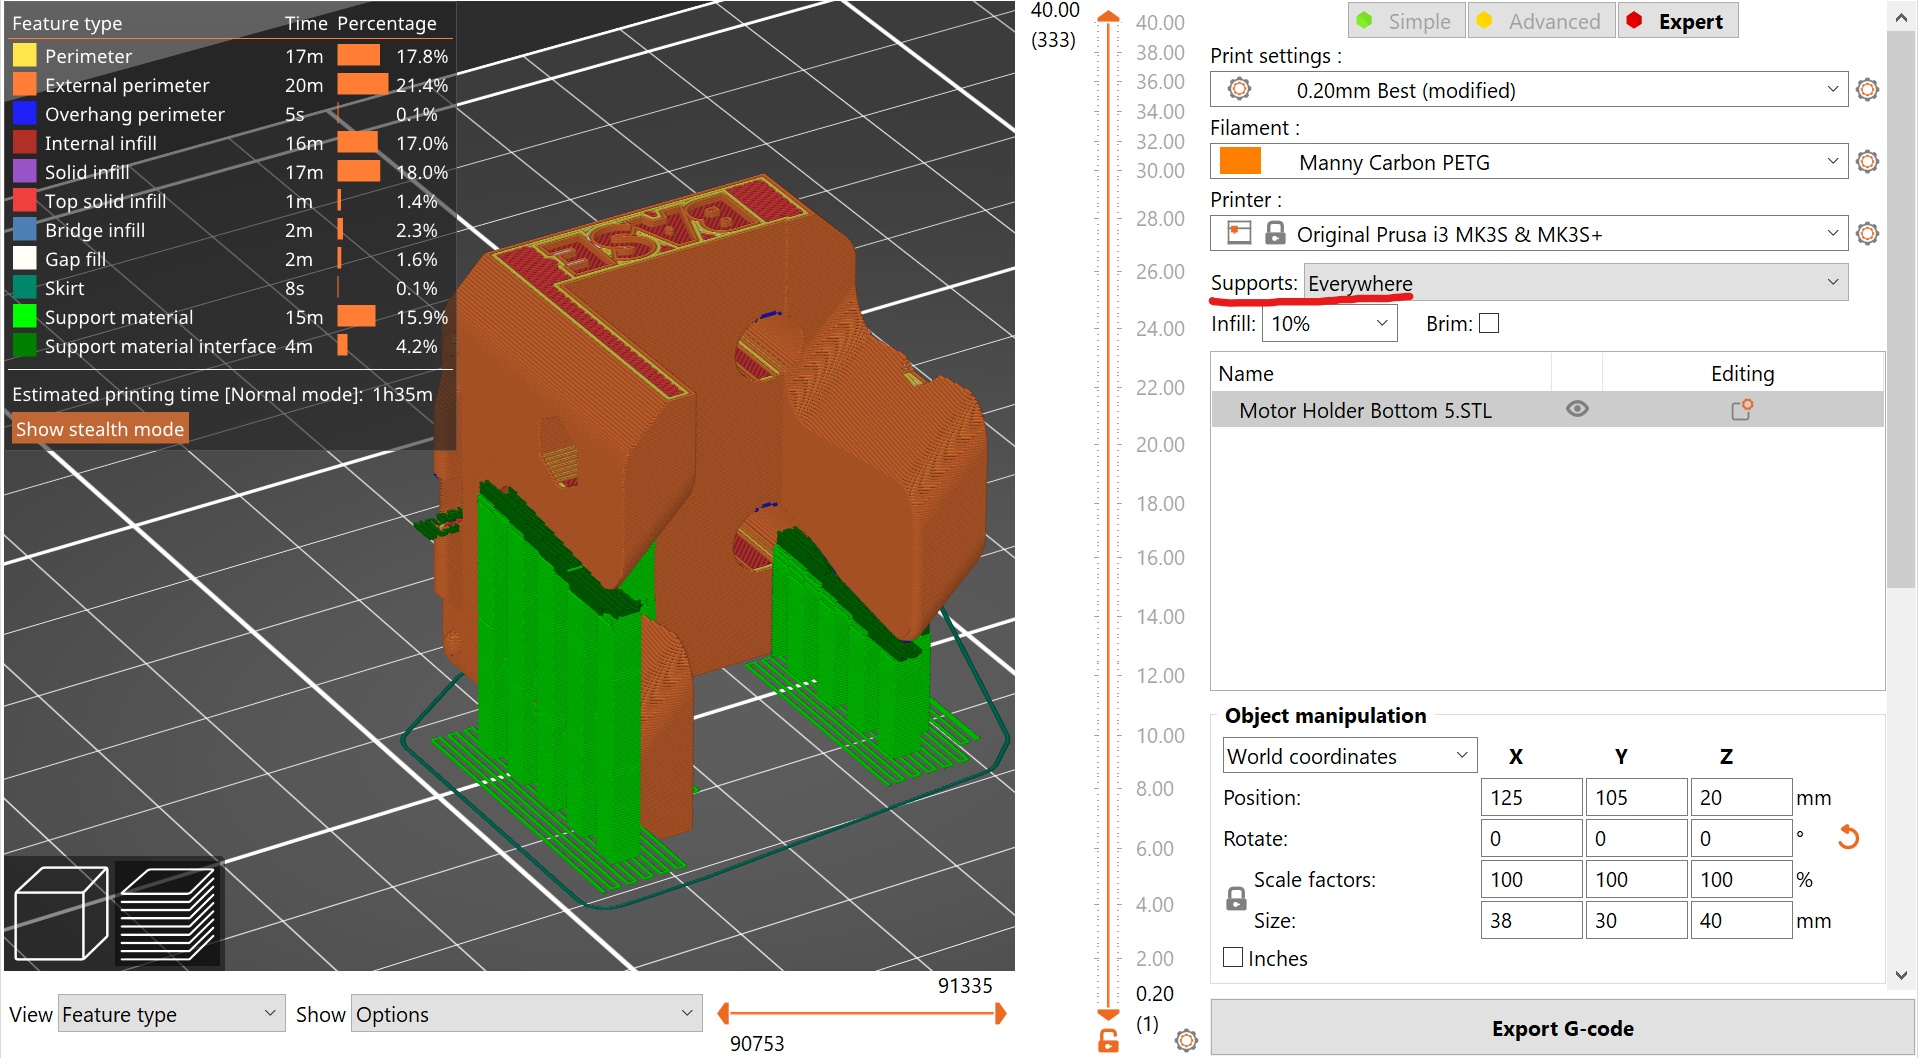
Everywhere
Everywhere there is an overhang, there will be a support
This offers the greatest support but there may be unnecessary supports which can be hard to remove and waste filament
Note the supports in the holes which will be hard to remove
For this model it will be best to use Painted Supports
Printer Settings
We can adjust the preset printer settings to change its characteristics such as improve strength
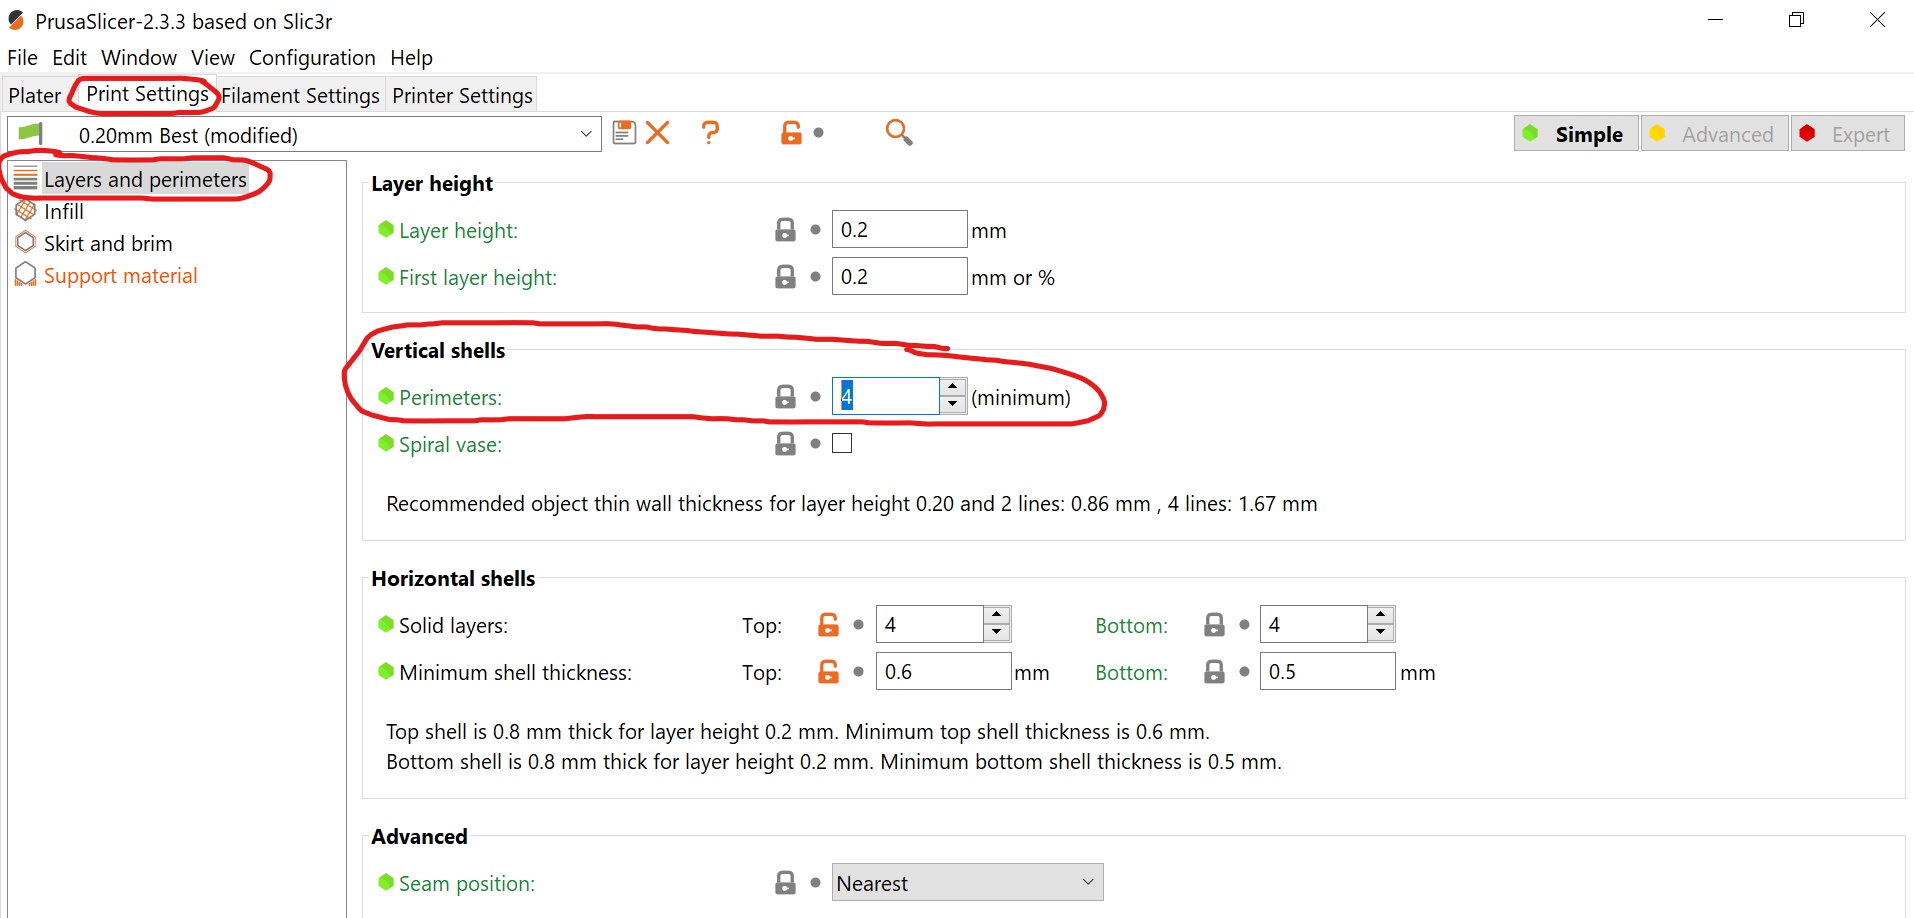
In the top tabs, select Print Settings
Select Layers and perimeters
We will adjust the perimeters of the model. This is the bes way to improve the strength of the model
- Perimeters
4
Select Infill
We will increase the fill density. This will improve the top layer of the print and increase strength
- Fill density
10%

In the top tabs, select Plater to return to the preview
You will have to reslice the model, select Slice now
Use the right slider to scan through the layer
You can now see the thicker perimeters and great fill
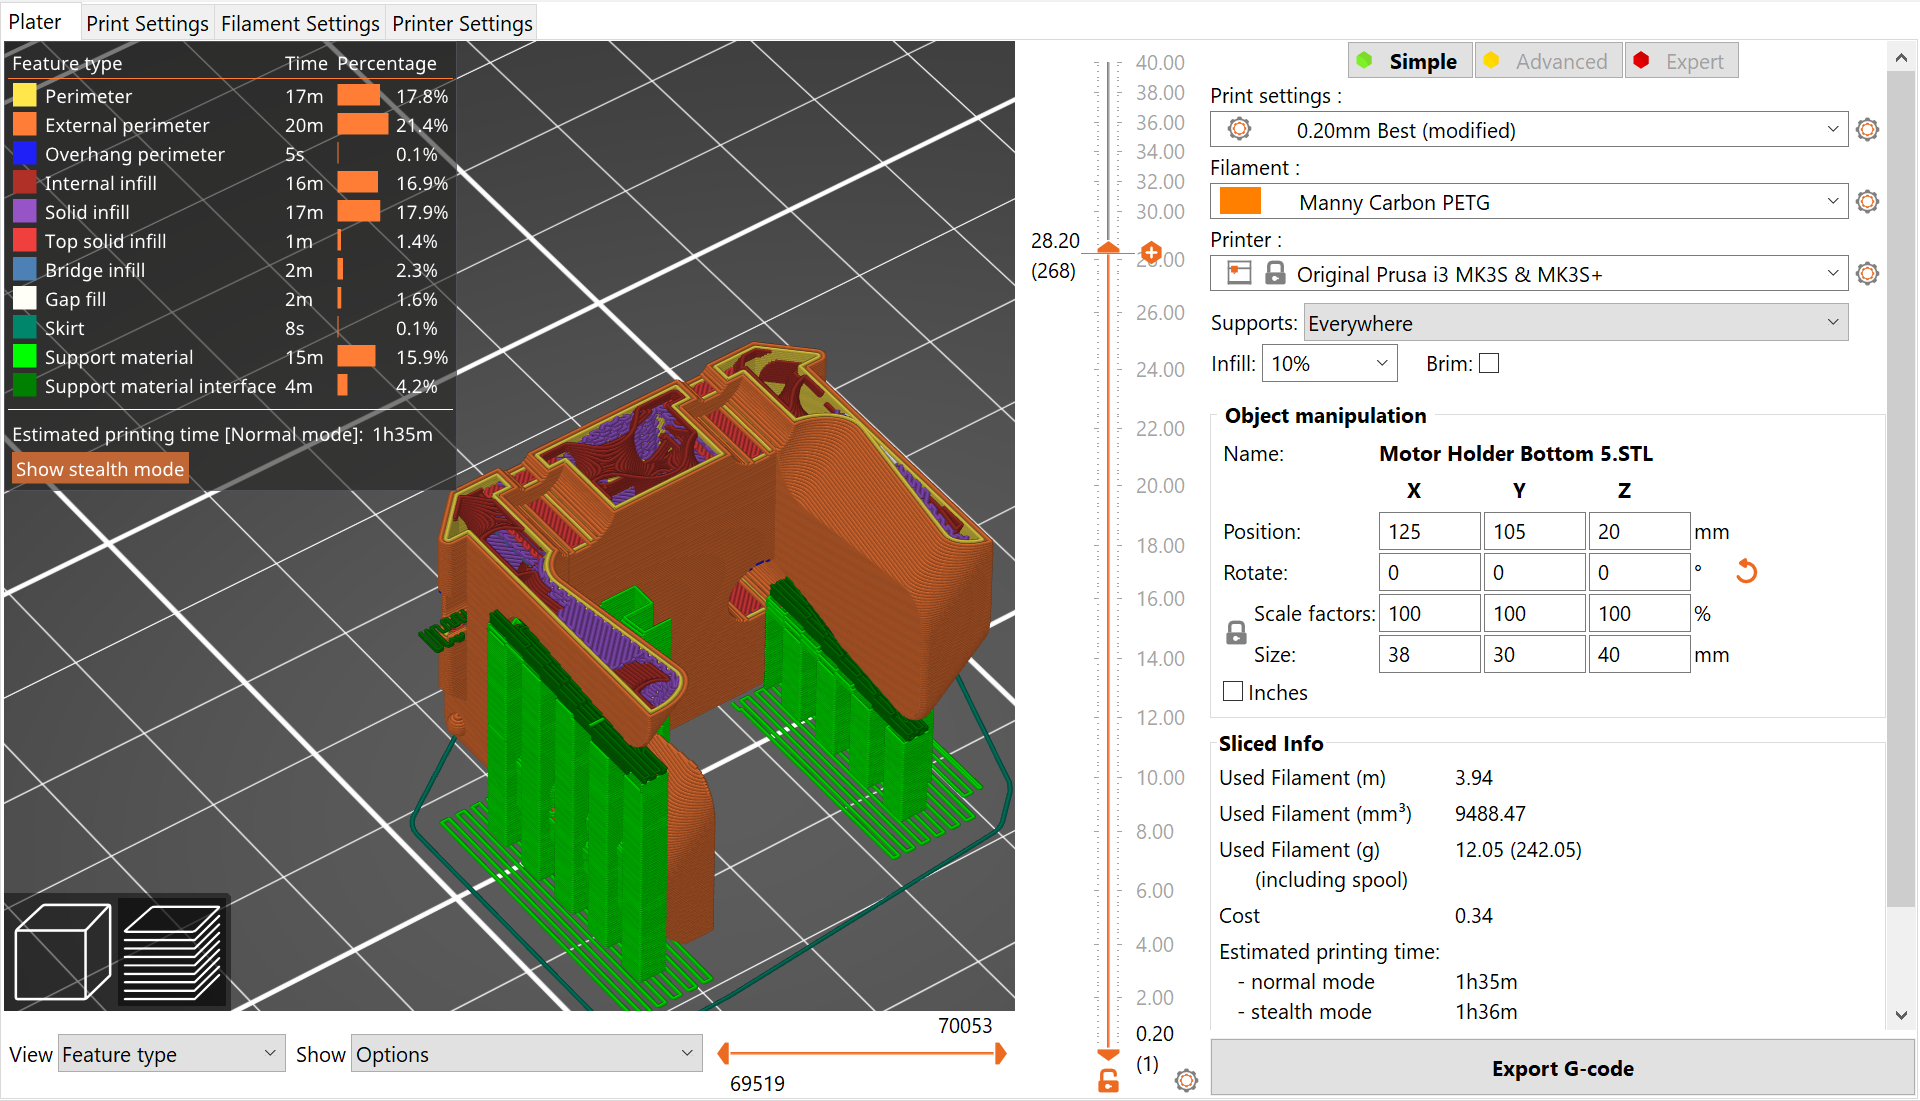
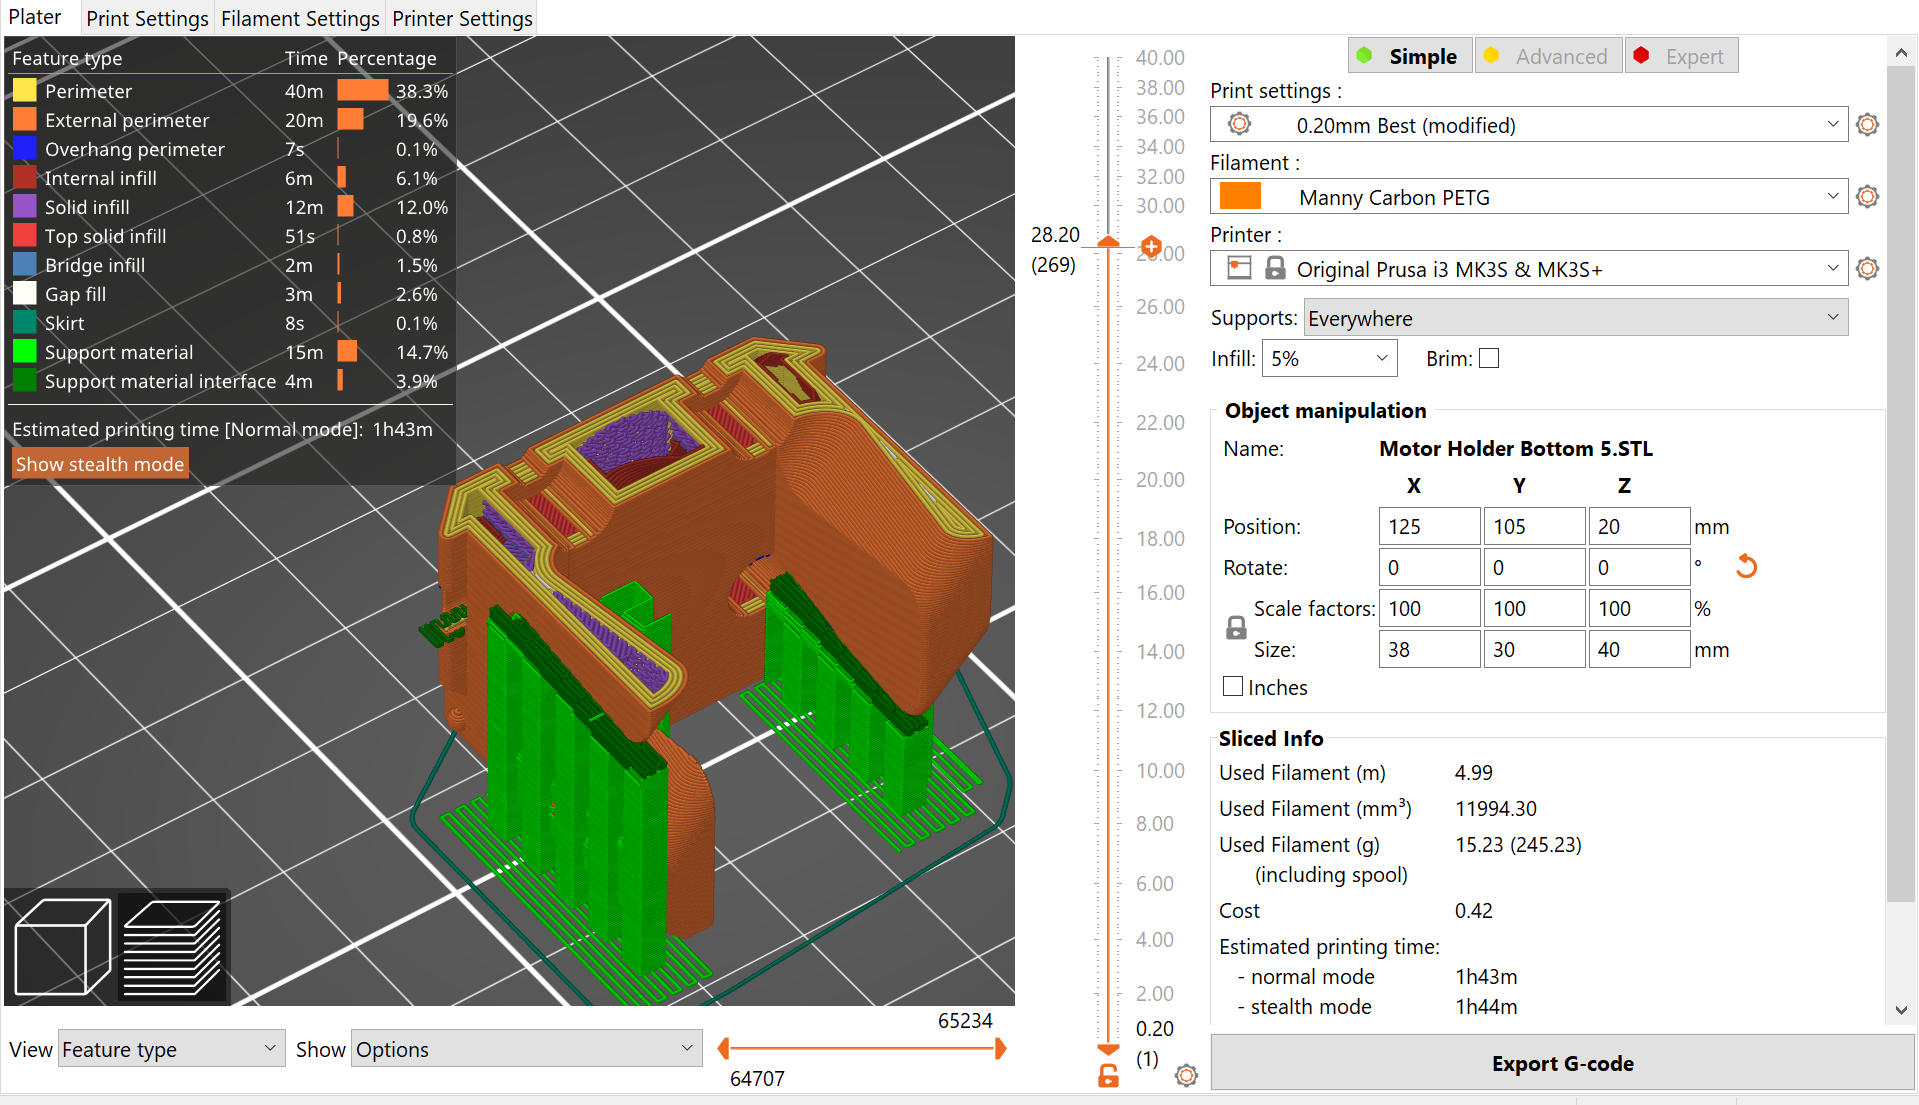
The Sliced Info panel has updated to reflect the changes
The below images show the changes have used an extra 3.2g of filament and increased print time by 9min
Thus when changing setting think about how it will impact the print time and filament used
Saving to SD
To make it easier to select the correct print it is recommended you leave the top level directory blank
I put the previous print in a folder so I have a record
Go to File Explorer and delete/remove the previous files
Click Export G-code
Advanced Slicer Options
Scale
Cut


Painted Supports